


Having a space of your own to enjoy a few drinks with friends and family is a goal of many a homeowner or apartment dweller. Whether it’s in a basement, garage, backyard patio or spare room, building a home bar can be a fun DIY project that will provide years of enjoyment and become the gathering place for all kinds of celebrations.
How To Plan & Build Your Home Bar
There are tons of options to consider when you’re building your home bar, so you’ll have to make some key decisions upfront.
Step 1: Determine Where Your Bar Will Go
The first question you’ll want to ask is where do you want to set up your home bar. Think about where you do the majority of your entertaining. That is more than likely the area where you’ll want it to set up a bar, or in a space adjacent to it.
Depending on the size of the space you’ve identified you may need to decide if this should be a permanent addition to your home or something that can be moved around. Those with limited space will want to be able to relocate their bar into a corner or even collapse it to free up space when it’s not in use, especially if the room is used for things other than entertaining.
If your home bar build is part of a project to create a new space for entertaining, such as finishing a basement or adding a patio to your backyard, then you can be more creative with your home bar plans because it doesn’t need to be retrofitted into an existing space
Wet Bar vs. Dry Bar
Those that want the option of having a wet bar will need to take the proximity to plumbing into account when deciding on a space. A wet bar gives you the convenience of having a fully functioning sink in your bar area for emptying and rinsing glasses. This is especially handy if you plan on making a lot of cocktails behind your bar. It would also be a welcomed addition if you are entertaining in a space that is not in close proximity to or on a different floor from your kitchen, or if you’re building a bar outdoors.
Modern design, however, has made the classic wet bar a bit outdated in certain aspects as open kitchens and living spaces have given people easier access to their kitchen sink. If you’re not in the mood to tackle a plumbing project, then a dry bar can be an ideal option for entertaining. Adding a dry sink to your bar gives you the ability to chill drinks or temporarily discard waste.
Home Bar Design Ideas
Here are some popular home bar design concepts if you’re in the need of some inspiration.
Living Room Bar
A home bar would be a welcomed addition for those that use their living room, great room or family room for entertaining. The amount of space you have will determine the size and style of the bar you add, but there are plenty of choices available.
A bar cart or simple shelving is a basic option for those with not a lot of room or if you need a portable solution. Setting up a liquor cabinet or bookcase bar will provide you with plenty of storage. They are also easy to close up and secure with a lock when the party’s over to keep the kids away when mom and dad aren’t around. Repurposing an older piece of furniture into a bar cabinet can make for a fun DIY bar project while giving you an interesting conversation piece.
When it comes to something permanent, building a simple, podium-style linear bar with room for some stools makes for an excellent space for making drinks while mingling. You can add some shelving underneath or behind the bar to house your spirits, mixers and glassware.
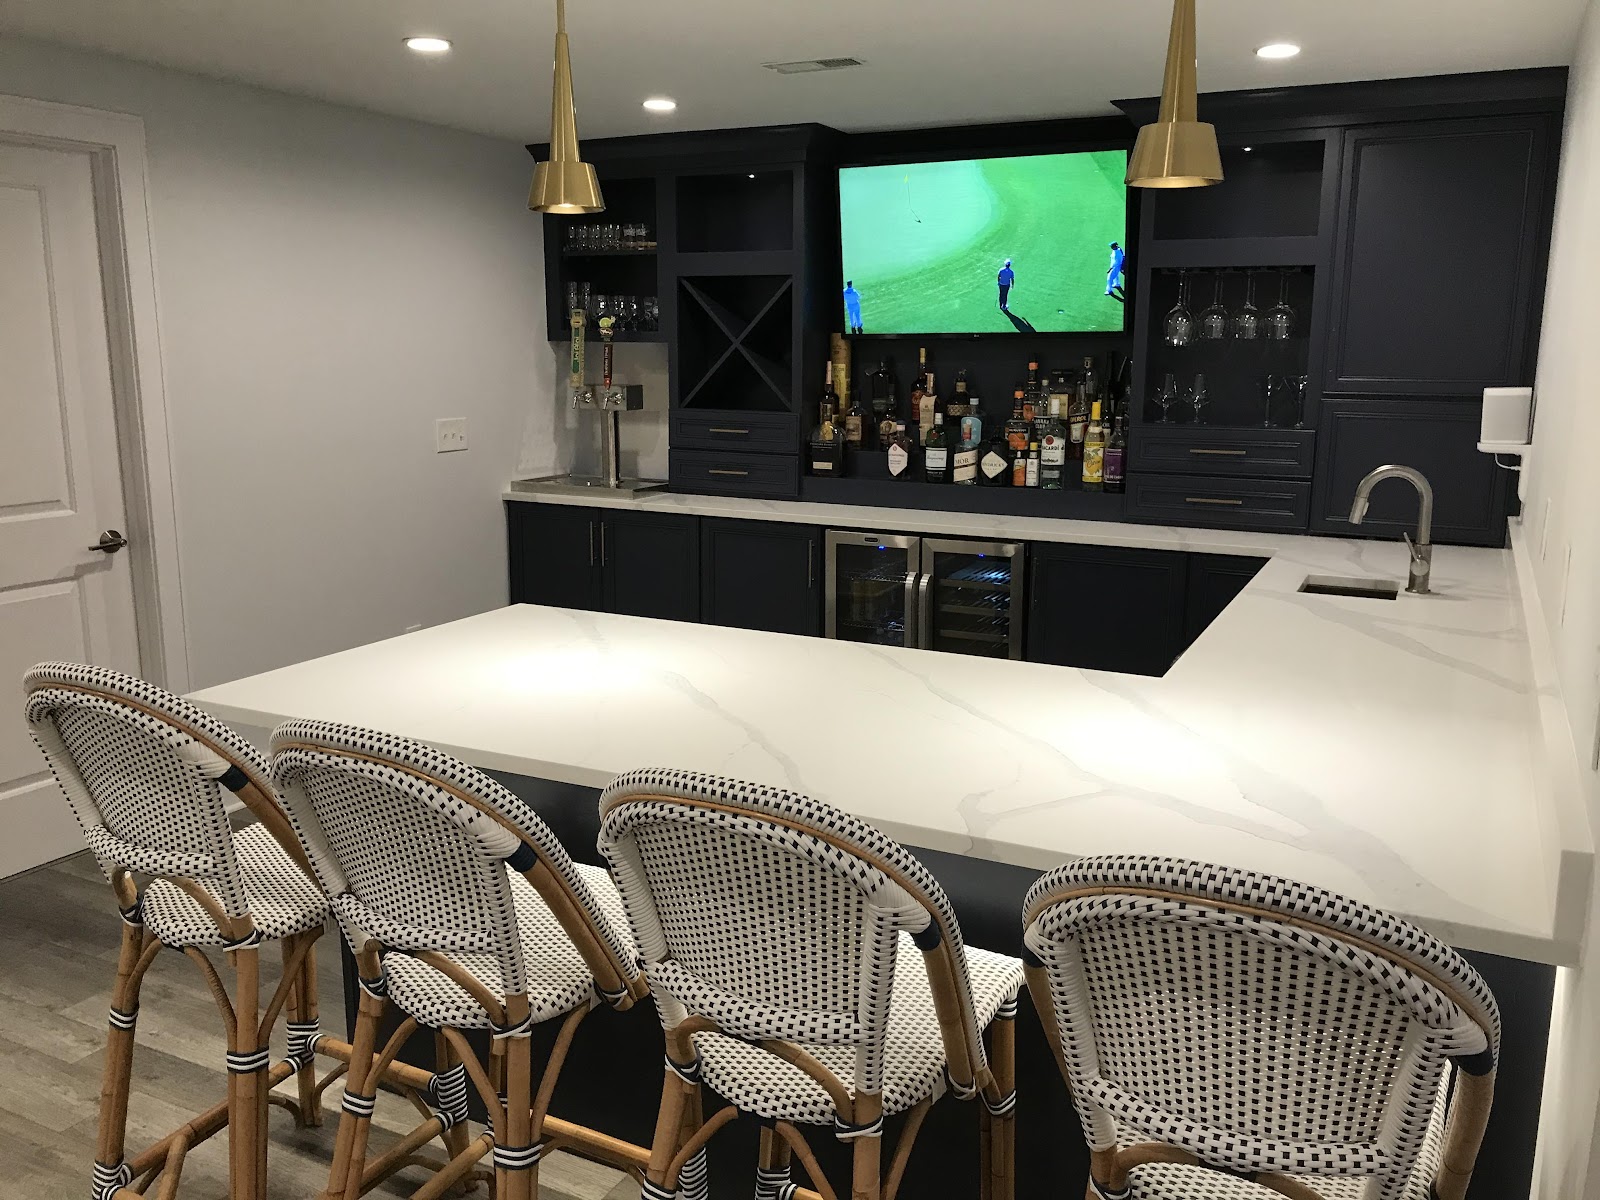
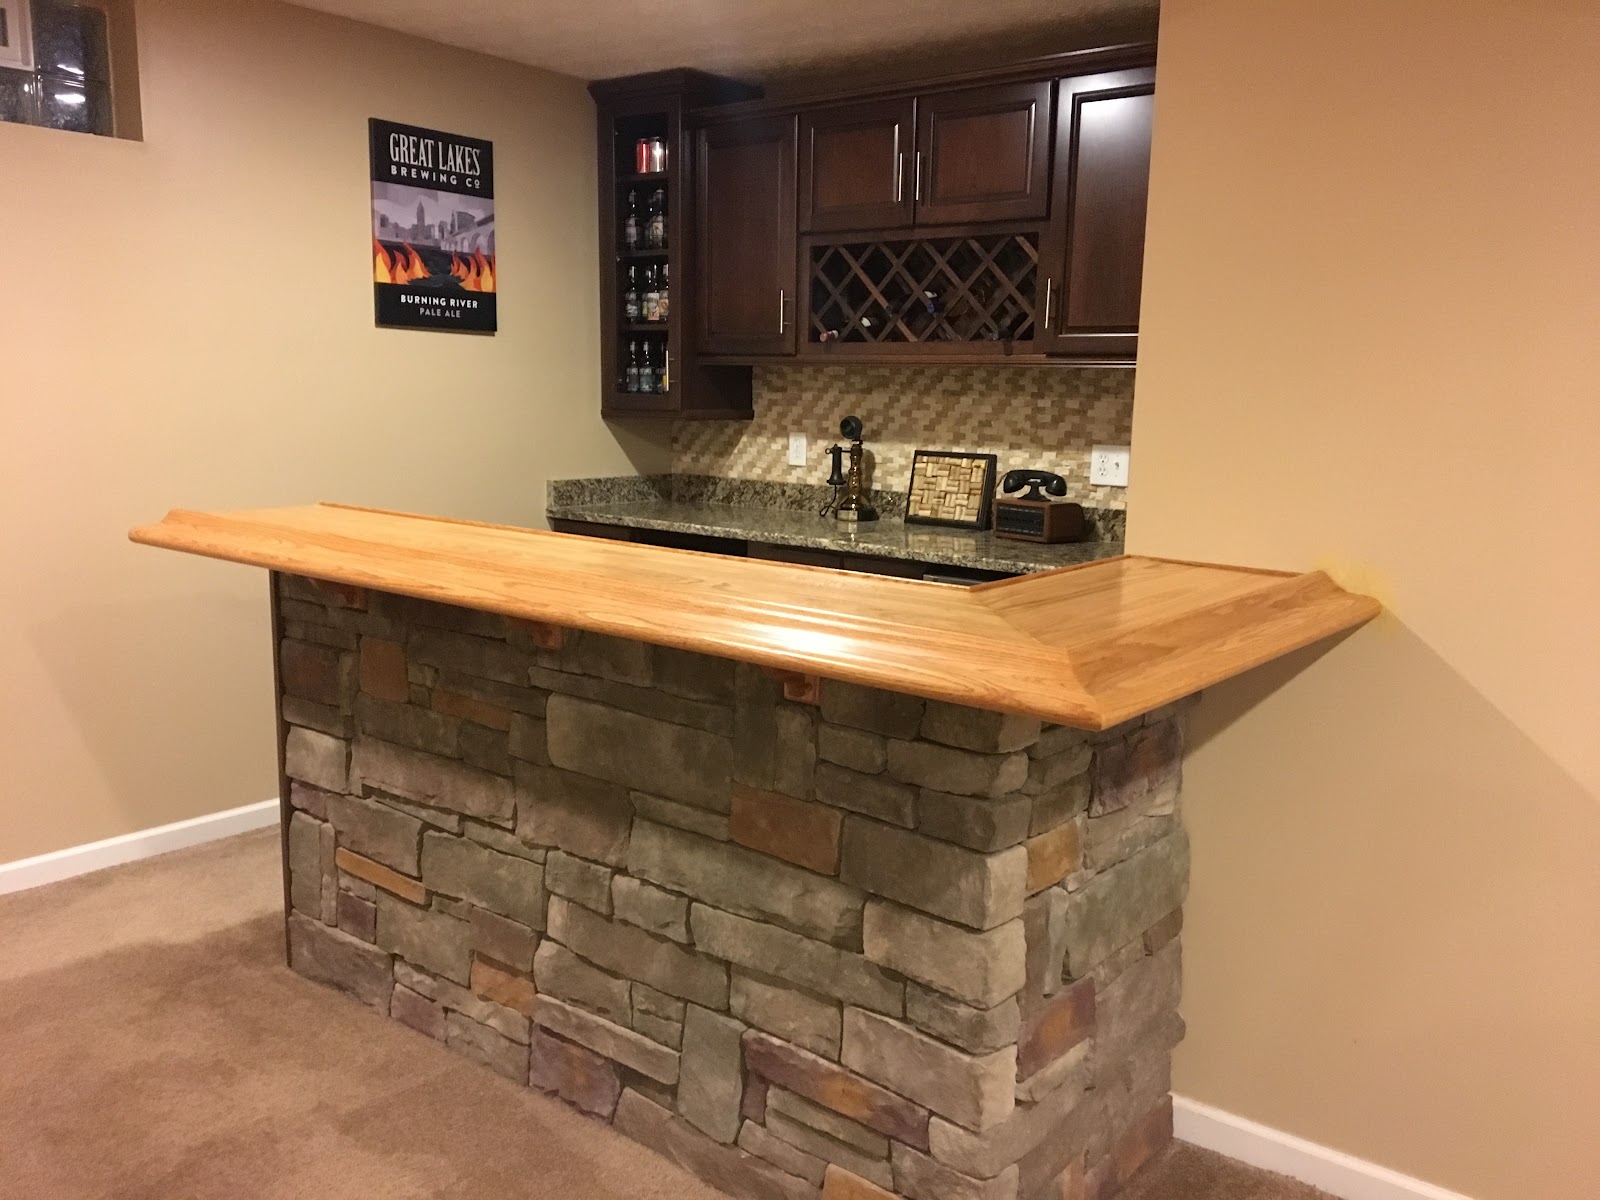
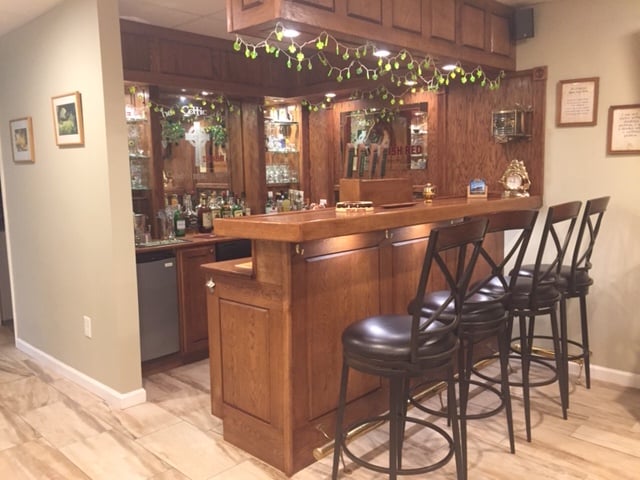
Basement Bar
A basement is a perfect space for building a bar because you have this whole floor of your house that you’re not doing anything with. It’s even possible to create a dedicated space for a bar even if you use part of your basement for storage or you have an area for doing laundry.
It could be as simple as setting up a bar and some stools with a kegerator or a refrigerator, or you could finish your DIY basement bar with insulated walls and flooring to create a space for hanging out and enjoying some drinks. Think of an unfinished basement as a blank canvas where you can use your imagination to create the ultimate home bar from the (under)ground up.
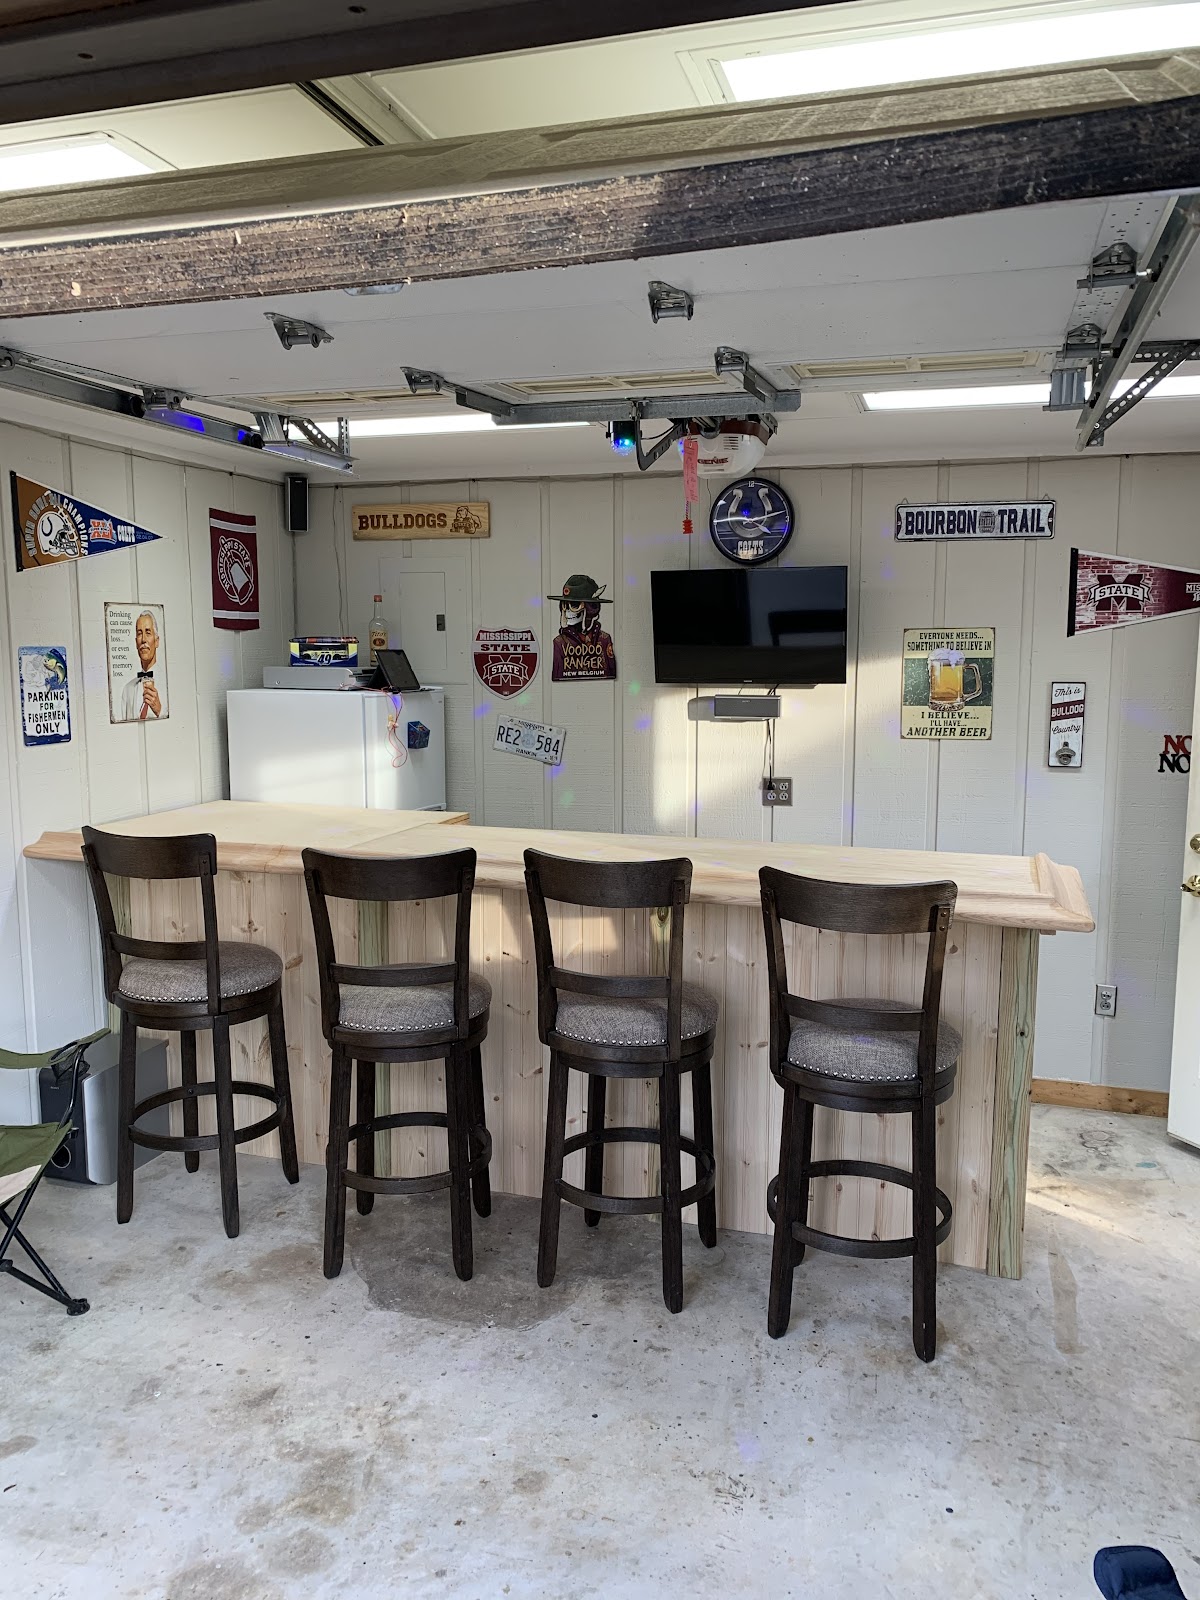
Garage Bar
Why use your garage to park your car or store your lawnmower when you can use it as a place to drink with your friends! A garage bar is similar in concept to a basement bar or man cave, but it has a couple of features that make it unique. First, it gives you a place to entertain without actually having to invite people inside your house. Plus, if your garage is completely detached from your dwelling, you can make a little bit more noise than inside your home when you have kids or anyone else trying to sleep or not wanting to socialize.
It’s easier to furnish than a basement bar because you won’t have to carry anything (equipment, fridge, keg, etc.) down a flight of stairs. On top of all that, it’s a pretty cool feeling to open your garage door and have an awesome bar right in front of you.
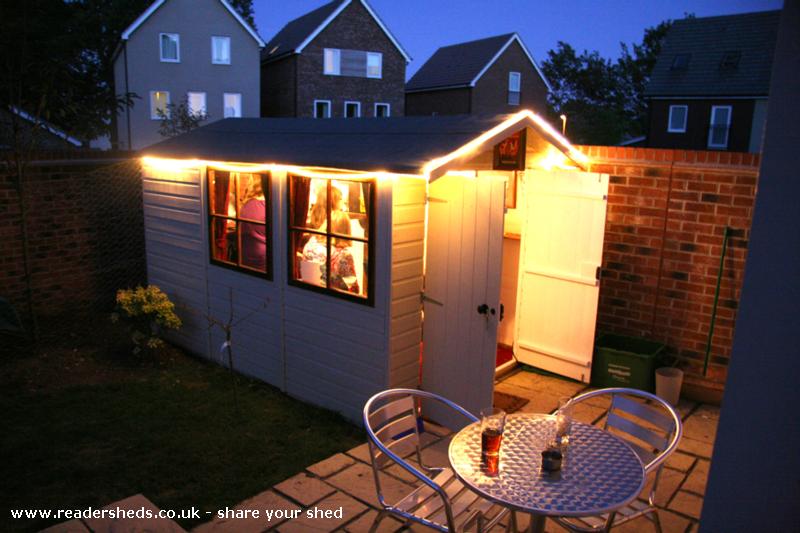
Pub Shed
The Pub Shed (or She Shed/He Shed) has become the Man Cave of modern times as this concept spread from the U.K. to the U.S. Instead of hanging out in a basement or garage a pub shed allows you to sit outside while enjoying a few pints or drinks with friends.
Depending on your setup you can build a pub shed with room for interior seating or have your guests sit outside and receive their drinks from the interior bar
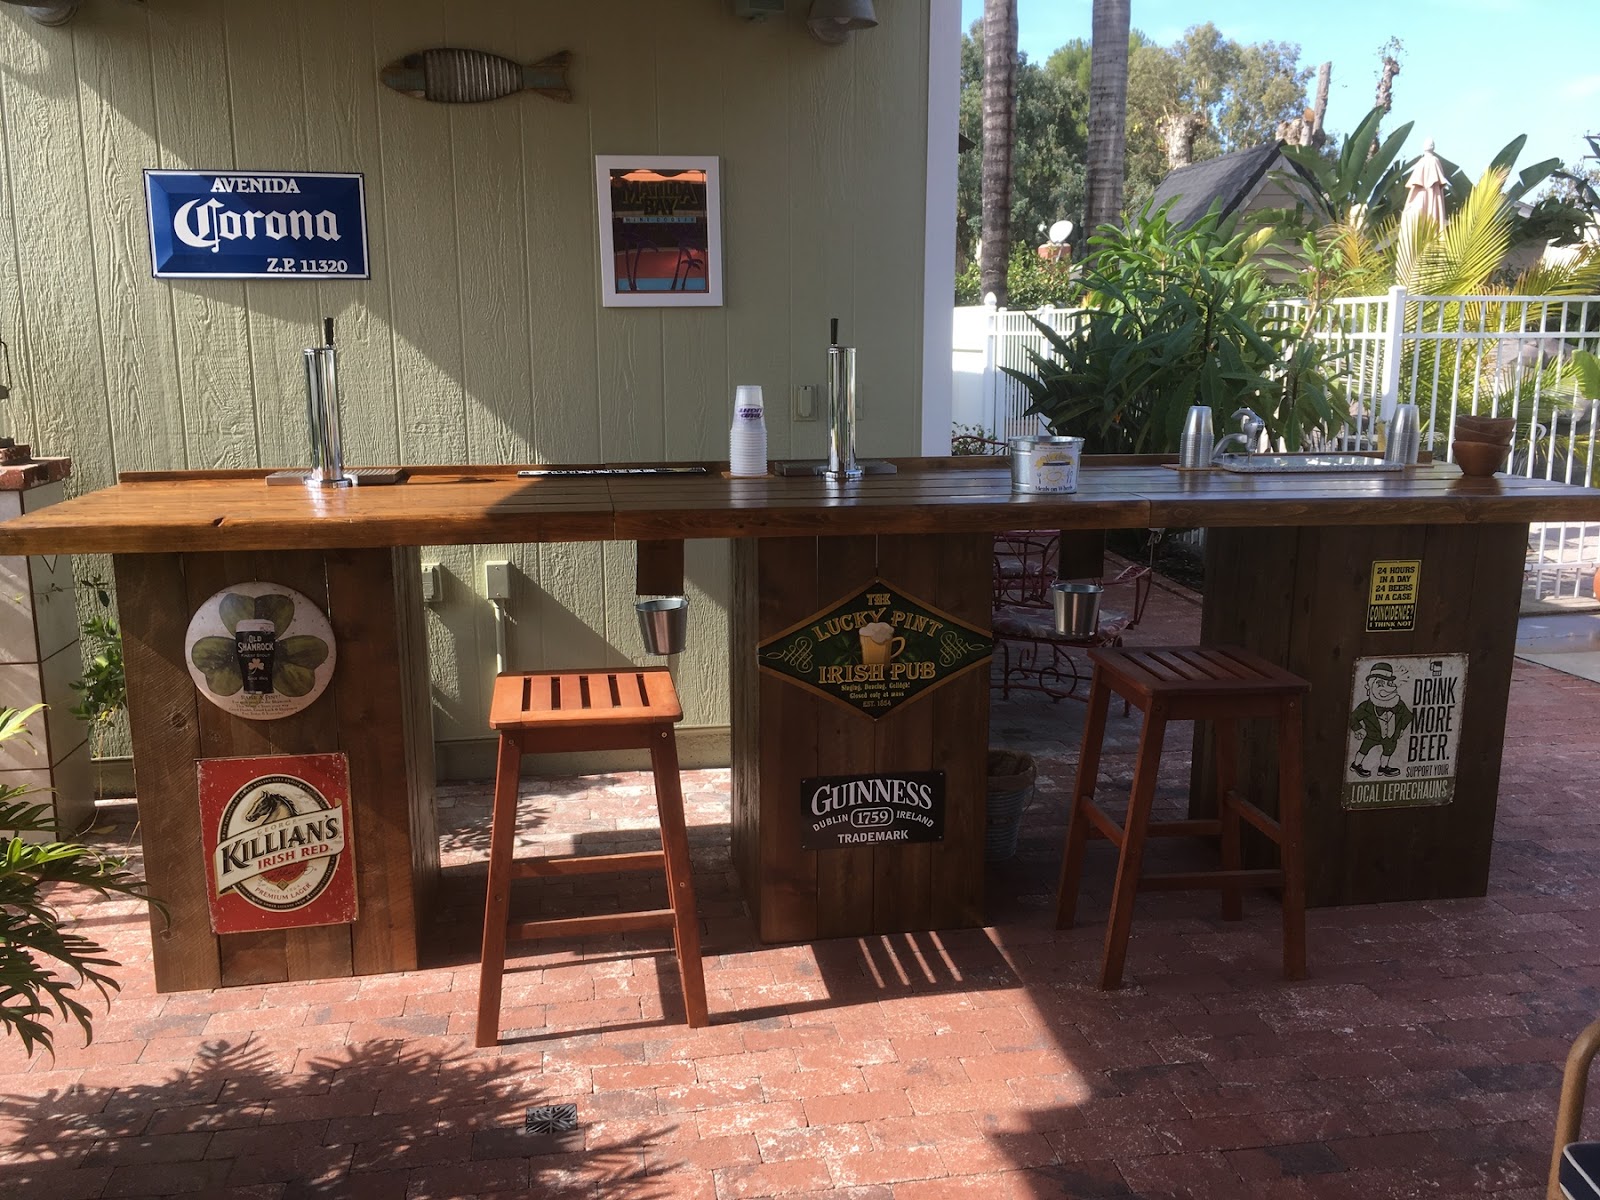
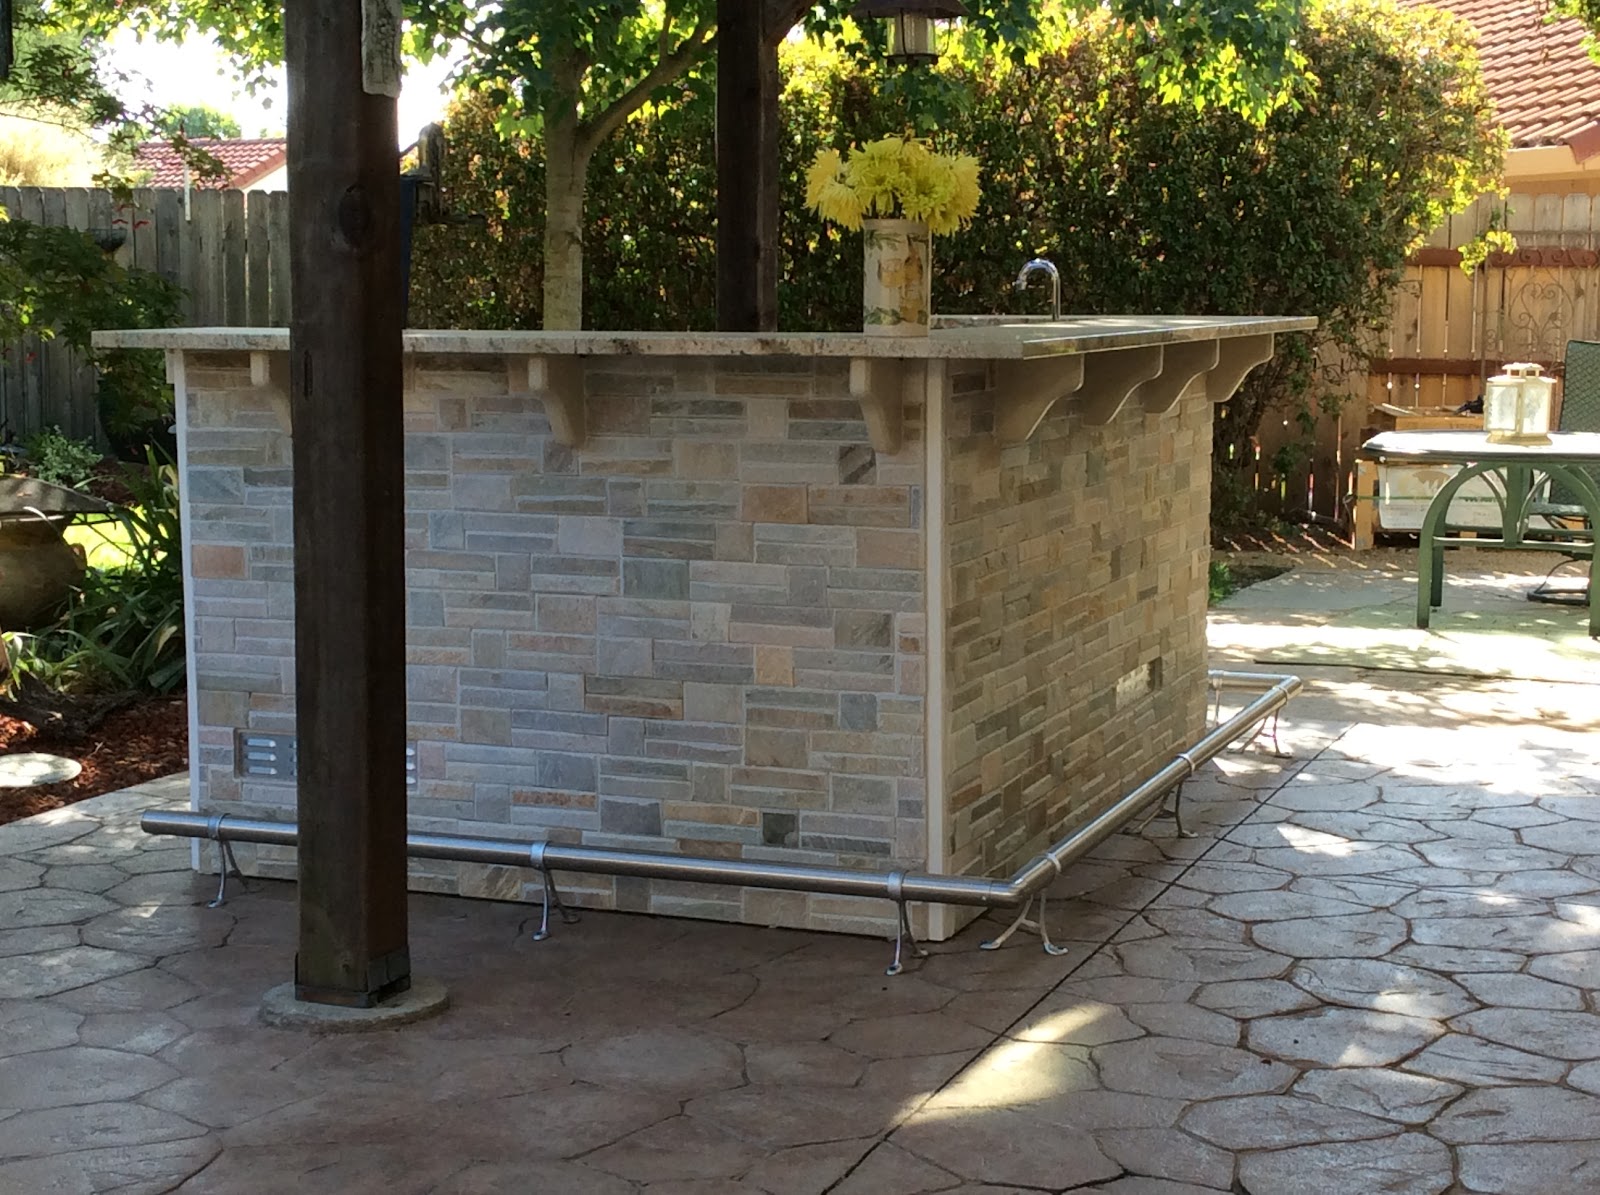
Outdoor Bar/Patio Bar
There’s nothing better than enjoying a drink in the great outdoors, so it’s an excellent spot to build a bar. You have a wide range of options when it comes to outdoor bars, whether you build something permanent or a portable bar that can be put up during the spring and summer, and then taken down when the weather turns cold.
Liven up your backyard patio, deck or pool area by adding a bar for mixing and serving drinks. You could keep it as simple as a dry bar with an ice bucket, a collection of mixers and spirits, cocktail glasses and a cooler filled with beer and soda or a full patio bar with a kegerator, fridge for keeping drinks icy cold and a space for your backyard grill.
When building an outdoor bar, be sure to use materials and fixtures that are designed to be exposed to the elements. This includes bar foot rail with a weatherproof finish that won’t rust and outdoor kegerators that won’t break when exposed to moisture.
Our DIY wedding bar is an excellent example of a temporary solution for an outdoor bar that allows you to serve draft beer, wine or cocktails on tap. This portable bar is ideal for any type of outdoor event.
Tiki Bar
If you subscribe to the tropical lifestyle or you’re just a fan of tropical tiki drinks, then you might want to create an island paradise. You can choose to purchase one of the many pre-built tiki bars that are available through various retailers or build your own. Whether you want to build it completely from bamboo or use basic wood and add a bamboo façade with a thatched roof, the level of detail and authenticity is up to you. Make sure to outfit it with plenty of tiki mugs, tiki-themed bar tools and tiki cocktail ingredients.
Step 2: Layout & Design
Completing the layout and design of your home bar is where it gets exciting and your vision starts to come together. Going through this important part of the planning process will help you determine what size bar your space can accommodate, what type of bar furniture and beer refrigeration you’ll need and the time and resources that you’ll need to make the dream a reality.
Measuring & Planning
More important than what you want, is what you can actually have. Identify possible restrictions and obstacles in your home, particularly in the room where you will be building your home bar.
Factors To Consider:
- Ceiling height
- Doorway and stairway widths
- Sump pump location
- Electrical outlets
- Cable TV hookups or Wi-Fi availability
- Access to water lines
How To Develop A Blueprint For A Home Bar
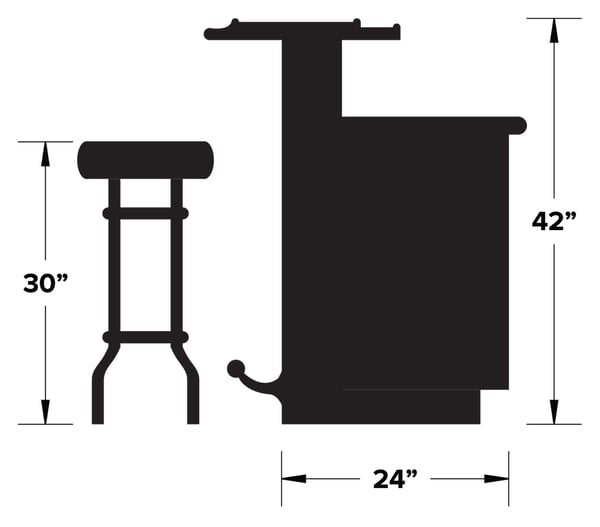
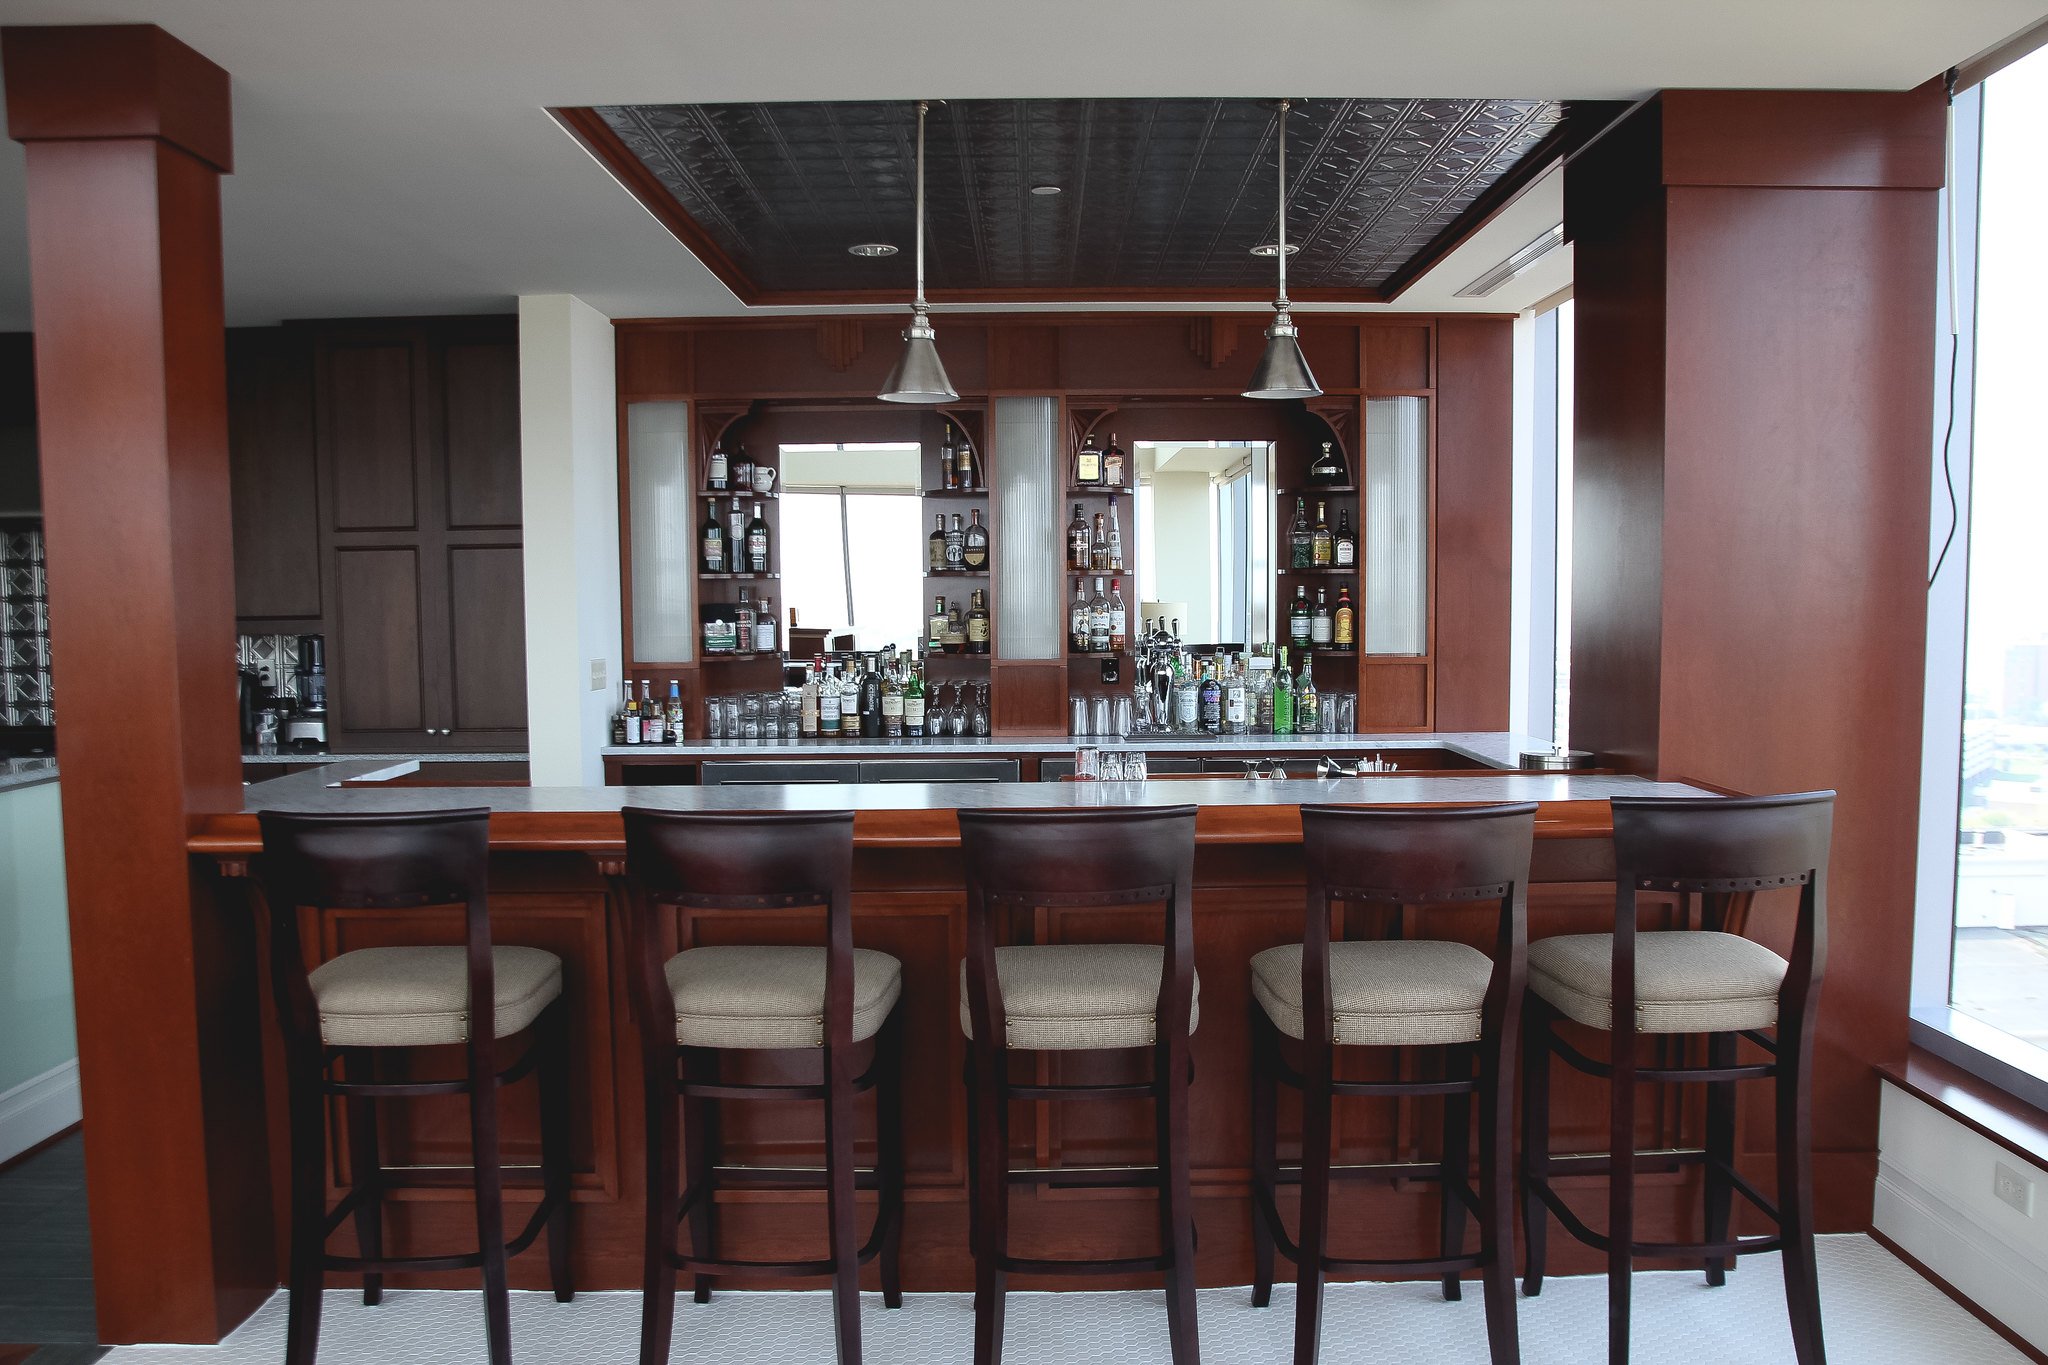
When coming up with the design for your bar, keep in mind that the average home bar is 42 inches high and 24 inches deep. Of course, you can customize your bar’s size to fit the area that you have available and your preferences. Just remember that most bar stools are 30 inches tall, so your bar should not be much lower than 42 inches high, to allow for comfortable seating for your guests.
Take comfort and accessibility into account when deciding on the length of your bar. Typically, you want about 2’ of space between bar stools to have enough room to navigate in and around the stools. Most standard home bar designs are at least 6’ long to accommodate three bar stools or an 8’ bar that will give you room for four stools.
You’ll also want to consider the shape of your bar. Several options are available, including L-shaped, horseshoe-shaped, or straight bar designs.
Layout The Floor Plan
If you’re starting your project in an area with a concrete floor, it’s smart and simple to outline your layout on the floor where the bar will be in chalk. If you’re working in an area with finished floors, it is still important to make an outline – you’ll want to use string or painter’s tape to protect your flooring.
Remember that your bar will be three-dimensional. The outlines on the floor won’t visually take up as much space as your finished bar will, once height is incorporated.
Step 3: Choose Design Elements & Materials For Your Bar
Before you start building there are a few other things to consider adding to complete the look of your home bar. Constructing a back bar or installing bar rail molding and foot rail can give your home bar a more authentic look and feel, as well as provide some added storage or comfort.
We suggest that you start your planning process by visiting your favorite taverns and/or restaurants and take a close (sober) note of what you like in a bar.
Pay close attention to the elements you like. For example: Do you like a big glass mirror behind the bar? What types of stools and bar rails fit your style? Take special note of the bar’s structure – how it was made and what it is made of. Snap a photo with your phone to reference later – pictures always help!
Design Elements To Note:
- Overall look and feel
- Bar surfaces
- Bar stools
- Carpentry
- Draft beer system styles (including beer towers, tap handles)
- Bar foot rails
- Bar décor, like signage
Bar Rail Molding
Bar rail molding or Chicago bar rail gives the exterior of your bar top a finished, professional look while providing a place for your guests to comfortably rest their arms while they enjoy a beverage. Arm rails can also prevent spills or glasses from going over the edge of your bar and onto the floor below.
Check out our post on how to install bar rail molding to learn more.
Bar Foot Rail
Installing a run of bar foot rail to your home bar adds a touch of style and class while providing your guests with a place to rest their feet as they sit or stand. Kegworks bar foot rail kits provide you with everything you need to install a straight run of bar rail. Bars with an angled layout can use an elbow fitting to connect runs of bar rail around a corner. Use our guide to Planning & Installing Bar Foot Rails to learn more about adding foot rail to your bar.
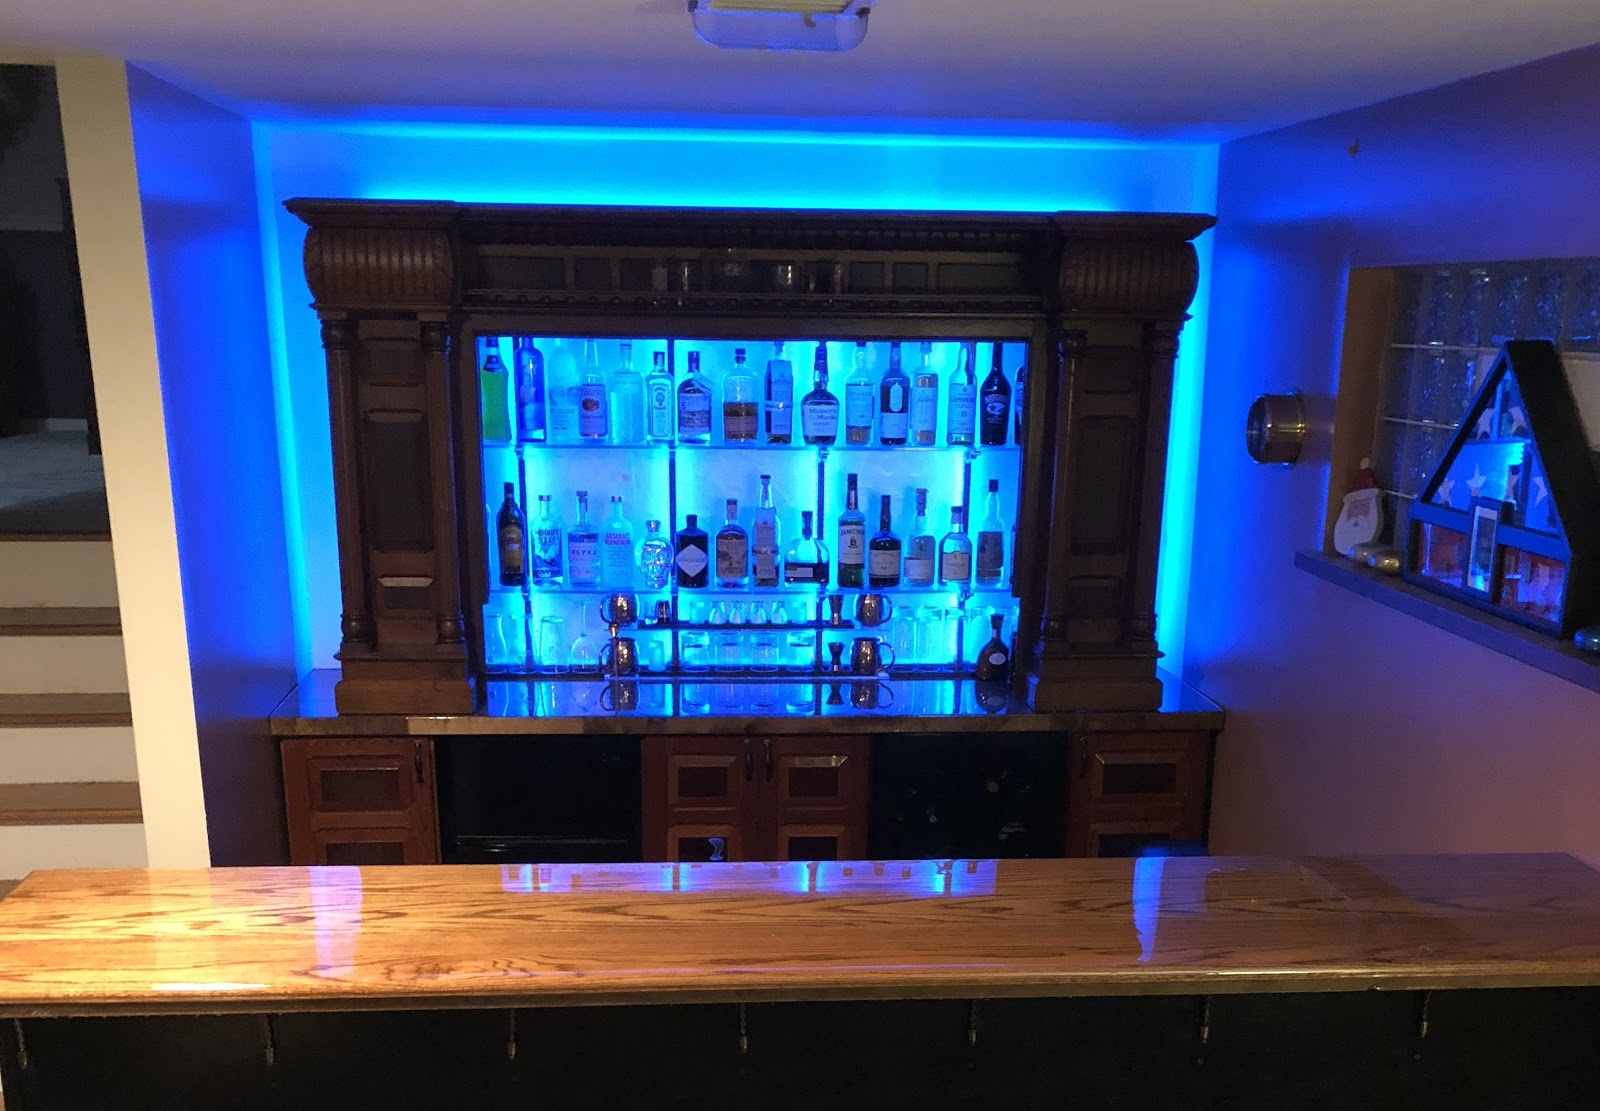
Back Bar & Shelving
For those that have the extra space, adding a full back bar will give your home bar a professional look just like your favorite commercial establishment. It provides you with an area for drink prep, plus shelving for bottles and glassware as well as the possibility of adding cabinets for storage or back bar refrigeration. Placing liquor bottle shelves along your back bar will give you additional space to store bottles and show off your collection of high-end spirits.
In addition to any shelves you build underneath your bar, adding shelving to a wall behind or adjacent to your bar will allow you to store and display liquor bottles or glasses without having to spend additional time and/or money on building a full back bar.
Drink Rail

If you're spending the time and money to build (or at least purchase) your own home bar, you'll want to help protect it. Installing drink rail around your bar helps prevent liquids from damaging the space on the bar where you normally make drinks. Installing drink rail is very easy because it just sits on top of the bar's surface and can be secured with some adhesive.
Step 4: Account for Appliances In Your Bar Design
During the planning stages, you will also need to take any appliances or fixtures that will be housed behind or under the bar into consideration, particularly sinks and refrigeration units.
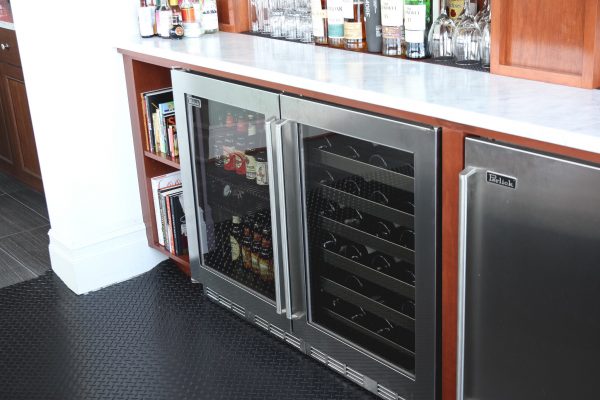
Bar Refrigerators & Kegerators
A bar fridge is pretty much a must-have for any home bar, that way you don’t have to run back and forth to your kitchen whenever someone needs a drink. They are the ideal option for chilling and storing bottled or canned beverages and mixers. Big wine drinkers may also want to install a separate wine refrigeration unit for their favorite bottles. Your exact refrigeration needs will depend on which kinds of beverages you plan on serving the most and how much you want to keep on hand.
Installing a kegerator gives you the option to serve draft beer on tap, so it's a wise option for any beer drinker to consider. Buying kegged beer is a more economical option for buying beer over time, and having a kegerator adds a bit of “wow factor” to your home bar that might want to make your friends come over even more. Even if you’re not a beer drinker, you can install a draft system that pours kegged wine or batch cocktails to fill your glasses with.
Be sure when you are choosing a kegerator for your home bar to purchase an under-counter kegerator unit. This style of kegerator is designed to be installed in an enclosed space because it can properly expel warm air from the refrigeration unit. Free-standing kegerators exhaust air from the back of the unit, which can get trapped without proper ventilation behind it. This greatly reduces the life of your kegerator. Learn more by checking out our video on how to set up a kegerator.
To install a built-in kegerator, you will need to cut a hole in your bar top for the draft tower that is big enough to feed the draft lines from the kegerator up to the draft tower as well as four holes for mounting screws to secure the draft tower in place. This process may be challenging depending on the surface of your bar top as granite and marble can crack when drilling. If you’re using a professional to install your bar top, then inquire if they can drill the holes needed for your tower ahead of time.
You’ll want to seal the gap between the top of the kegerator and your bar top to minimize any loss of cold air while reducing the possibility of your beer being exposed to warm air. Using PVC tubing or pipe to help run the draft lines to the tower can help close that gap. Be sure to insulate your tubing to help keep your lines cold and the beer chilled as it runs from the kegerator to the tap to prevent foaming.
Bar Sinks
Sinks are usually placed under the front bar but putting them in the back bar is not unheard of. The location of your existing plumbing may play a part in where you decide to build your bar or install the sink and drainage. From simple, shallow one-bowl hand sinks to standard bar sinks (with legs, up to three bowls and a drain board) you’ll have tons of options when selecting a sink to best fit your space, needs and design.
Ice Machines
A built-in ice machine or ice maker may be considered a luxury to some home bar owners, but if you're using a fair amount of ice, it can save you lots of time, hassle and money in the long run. Consider how much entertaining you plan on doing, the proximity of the nearest ice source and how much money you typically spend on bagged ice when deciding on adding an ice machine to your bar.
Step 5: Decide on a DIY Home Bar Build vs. Hiring a Contractor
When putting in a home bar, you initially have three basic options. You can purchase and install a ready-to-assemble (RTA) home bar, build a custom bar yourself, or hire a contractor to do the custom job for you.
The right option for you depends on the amount of free time you have, how handy you are, the size of your budget, and the time frame in which you want to complete the project. If you go the DIY route, consider how many capable buddies you have who might be willing to help (in exchange for an open invite to your completed home bar) and other important factors like access to tools & materials.
Hiring A Contractor
For big or complex projects you’ll probably want to seriously think about hiring a general contractor. A home bar has many facets and could require the expertise of several different craftsmen. A contractor will handle all the plumbing, electrical, carpentry, permits (if needed) and cleanup. The contractor can also work with you on design and they’ll alert you to any potential problems and/or concerns. Most likely they will get the job done quickly, with minimal stress on your end.
Before you start, get a few estimates. They are typically free and you will have greater bargaining power on price in the end if you do.
Have your wish list ready in writing, so that neither you, nor the contractor overlooks anything. Take the advice from above, sketch out your ideas and plans, and have this ready as well.
Once you receive your estimates read them over carefully! A good estimate will include a contract, price breakout, total cost, and payment terms. Make sure every element that you want in your bar is included in the estimate, before you select the right contractor for the job.
Once you select a contractor, make sure you discuss a timeline for completion. Have the contractor include this date in the contract, along with a penalty clause if they don’t meet it. Most reputable contractors will do this. Beware of the guy who has six jobs going at once! You want your contractor to show up everyday and get the job done.
It is wise to purchase all of the refrigeration units, sinks and large-scale items that you will need for your bar, before your contractor begins on your project! Don’t let the contractor guess on sizing – have all of items at your house. This will eliminate unpleasant surprises and greatly reduce the potential for screw-ups.
Building The Bar Yourself
If you’re up for the challenge, building your own bar can be a very rewarding experience! If you’re fairly handy or have fairly handy friends who might be willing to work for beer, your home bar project could be a darn good time.
Check out some real life bar building advice, learned from experience:
- Make like a boy scout and be prepared! Get everything you need before you break out the hammers. You should plan, measure and then build.
- It never hurts to have extra materials on hand. Mistakes and surprises happen and when they do, having extra pieces and parts available can save a lot of headaches.
- Don’t be ruled by dollars alone. Staying within your budget is important, but the quality is pretty important too! Inexpensive components don’t always last and when you’ve gotta fix ’em or replace ’em, you’re losing valuable time that could be spent relaxing in your bar.
- If you are enlisting the help of friends, have them over to check out your drawings. Get everyone on the same page. The masterpiece that you’re envisioning might be different from your buddy’s dream bar—so make sure he knows what he’s in for.
- ‘The more the merrier’ might sound like a good philosophy, but realistically one or two helpers at any given time are plenty. The more people you have helping you at once, the more likely it is to morph from making progress on your project to a social occasion. You and your friends can hang out after the bar is built!
- If you have a workstation located in another area, keep in mind that you will need to be able to get every piece of the bar from your shop into the actual bar room. There’s nothing worse than putting something together, only to realize that it won’t fit through the doorway.
- Don’t crack open too many beers until after you’re done working for the day—especially if you’re using power tools.
Outfitting Your Home Bar
The next step after building your home bar will be stocking it with the proper supplies and adding any finishing touches to the decor of your new headquarters for tipping back a few beverages. Just like having the right materials and tools was important for building your bar, having the proper tools for drinking is the key to any proper home bar.
Home Bar Supplies & Accessories
Keeping your bar neat and organized not only provides for a better-looking area to impress your guests, but it also makes it a lot easier to make drinks because you know where everything is. You’ll want to add some of the following bar service supplies to keep your bar in order:
- Liquor Bottle Shelves
- Speed Rail
- Bar Caddy
- Garnish Tray
- Glass Racks
- Drip Trays
- Bar Mats
Stock Your Bar
The most important part of your will be, of course, the booze! You’ll want to stock your bar with plenty of your favorite drinks since you’ll be the person spending the most time in it, but we have put together a list of home bar essentials for when it comes time to invite friends and family over a few drinks.
Personalize Your Bar
Decorating the room or space where your new home bar is built will complete the look of your project. Every good bar has a few humorous bar signs on the wall, a bar mirror that features the logo of your favorite beer or drink or some neon/lighted signs. If you plan on using your bar area for watching sporting events or movies, then a television or home theater system will be a must-have.
Classic bar lighting, including overhead hanging lamps or billiard lamps, provide you with some options for illuminating your space as opposed to traditional room lighting.
Once your home bar project is finished and fully stocked, you can sit back with a good drink and enjoy the fruits of your labor. All that’s left to do is invite your friends over for some company, and so they can marvel at the work you’ve accomplished.
Kegworks
Kegworks has been transforming hospitality spaces since 1998 with expertly crafted architectural metalwork and professional draft beer equipment, helping designers, architects, and bar professionals bring their visions to life.

Leave a Comment