

The perfect do-it-yourself project for a draft beer enthusiast is building their own kegerator.
Nothing beats the pleasure of having a cold beer in the comfort of your own home. That's why we have a wide selection of ready-built kegerators. However, for those who enjoy the DIY approach, our guide can help you turn a regular fridge into a kegerator. With only basic tools, a fridge, and a kegerator conversion kit, you can have a do-it-yourself kegerator and enjoy delicious draft beer in no time!
How to build a kegerator using a conversion kit
Download Instructions
- US Sankey Kegerator Conversion Kit Instructions
- Low Profile US Sankey Kegerator Conversion Kit Instructions
- European Sankey Kegerator Conversion Kit Instructions
- Single Tap Tower US Sankey Conversion Kit Instructions
Selecting your refrigerator and kegerator components
To start your DIY kegerator project, you will need a refrigerator, draft beer components, and tools to install them.
When building a DIY kegerator, the best-sized refrigerator to use is a full kitchen fridge with a freezer on top. However, any fridge can be used as long as it fits a keg, plus approximately 6-8 inches of clearance above it to fit the coupler. You will also want to account for room to be able to tap and untap your kegs. If you're limited on space, consider using a low-profile keg coupler. A standard US Sankey Keg Coupler is 3 & 3/4" tall and 7" wide, whereas a Low Profile US Sankey Keg Coupler is 2 & 1/8" tall and 4" wide, giving you extra clearance in a fridge with limited space.
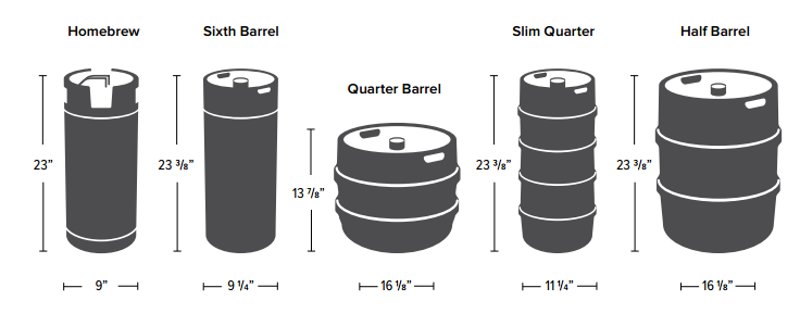
Don't forget that beer kegs come in different shapes and sizes, so make sure the beer you want to serve on tap comes in a keg that will fit inside your refrigerator. Reference the graphic below and check out our Guide to Beer Keg Sizes to learn more about the available styles of kegs.
Luckily you have come to the right place to pick up draft beer components needed for building a kegerator. KegWorks carries a selection of kegerator conversion kits that will provide you with everything you need based on the type of beer you want to serve and how many beers you want to have on tap. For the more experienced users, we recommend our custom kits that allow you to select the parts you need to get exactly what you want.
One thing to remember when selecting your kit and/or components is that different brands of beers or imported beers may require different keg couplers. A US Sankey Keg Coupler will fit 99% of all beers brewed in North America. Check out our keg coupler list for more information on which couplers are compatible with which beer styles.
Want to pour Guinness or other nitrogen stouts? You can adapt your conversion kit with a Partial Murphy's Conversion Kit and a nitrogen tank. And if you know you only want to pour nitro stouts, the Guinness Kegerator Conversion Kit is a simpler setup. Learn more about pouring Guinness on tap in our Guinness on Tap Guide.
Suppose you're looking to pour your own homebrews. In that case, our Homebrew Kegerator Conversion Kit is specially designed with Cornelius keg parts to make connecting and disconnecting your corny kegs quick and easy.
This guide demonstrates how to install a single tap conversion kit, which is the most popular option for converting a refrigerator into a keg fridge. However, there are other options, including double tap conversion kits and tower conversion kits.
Double Tap Conversion Kits
If you want to serve two kegs, a double tap conversion kit is your answer. Remember, you’ll need room inside the fridge to house both kegs for proper dispensing.
Tower Conversion Kits
A tower conversion kit is a great option if you are using a chest freezer for your kegerator build (commonly known as a “keezer”). It attaches to the top of the freezer and can accommodate multiple faucets for pouring a variety of beers. (Pro tip: Building a keezer requires an external temperature control unit to ensure the temperature inside of it doesn’t fall below freezing.) A tower conversion kit is also commonly used to upgrade or refurbish a purpose-built kegerator.
See our complete list of Kegerator Conversion Kits
Tools you'll need for building a DIY kegerator
You'll need the following tools to install and connect the draft beer components for your kegerator:
- 7/8" Hole Saw
- Power Drill
- Flathead Screwdriver
- Spanner Wrench
- Hex Wrench
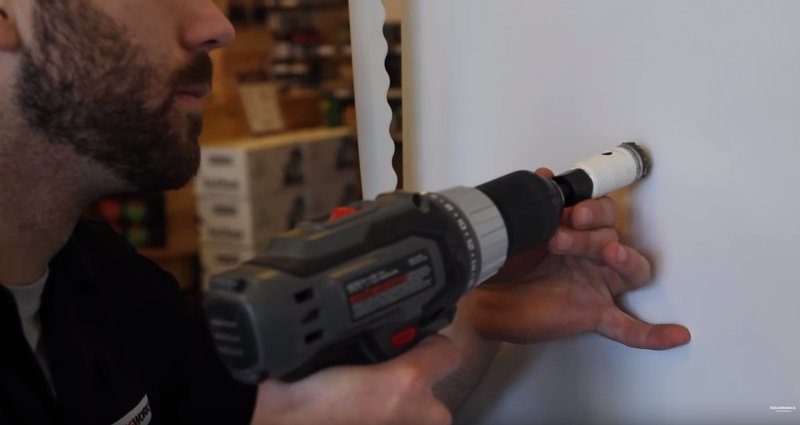
Step 1: Drill the desired location
Make sure the refrigerator is unplugged. With a power drill and hole saw, drill a 7/8" hole in the door or sidewall of your refrigerator for the faucet and shank; do not drill into the back wall of the refrigerator. Check the inside of the door to be sure you have clearance for your shank. Also, ensure you have enough distance from the freezer door to open it up without hitting the tap handle. Lastly, be sure to saw all the way through the door and the plastic liner on the inside of the door.
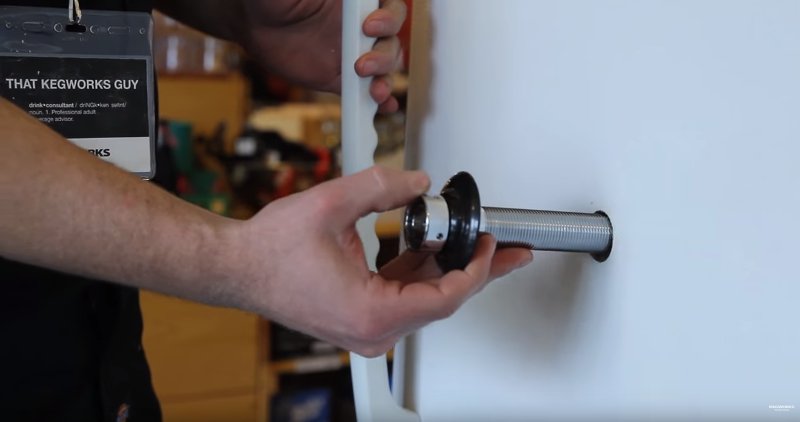
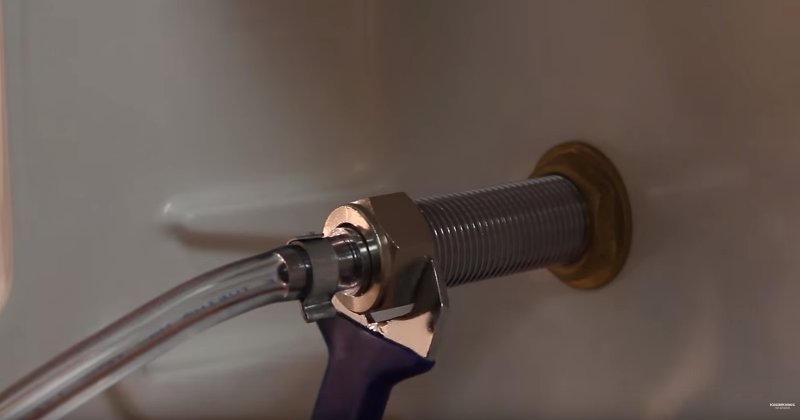
Step 2: Connecting the faucet and shank
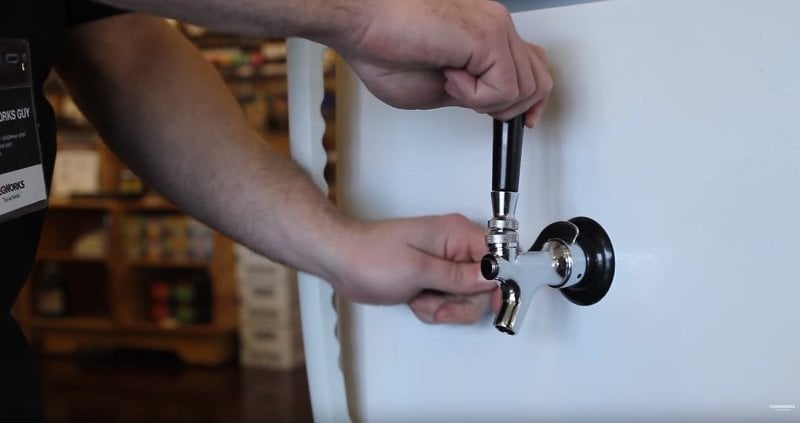
Insert the shank through the hole you just drilled (from the outside) and secure it with a brass flanged lock nut; the black plastic flange goes on the outside to help cover up the hole you made.
Attach the faucet head to the shank and tighten it with a spanner wrench.
Step 3: Connecting the beer and air lines
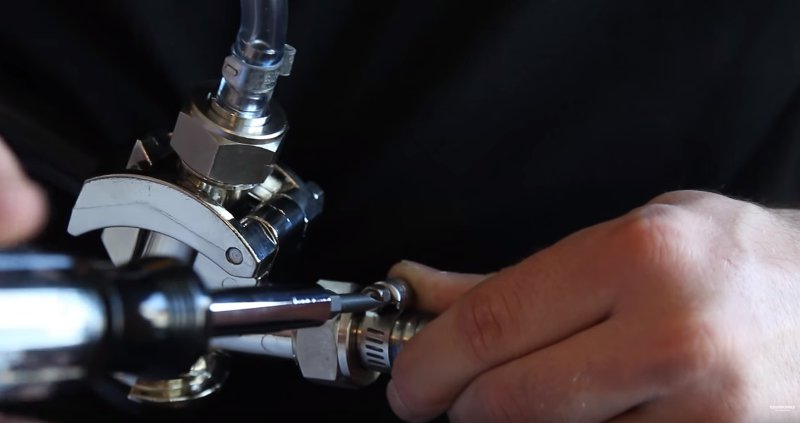
Attach the beer line hex connections to the back of the shank and the top of the keg coupler.

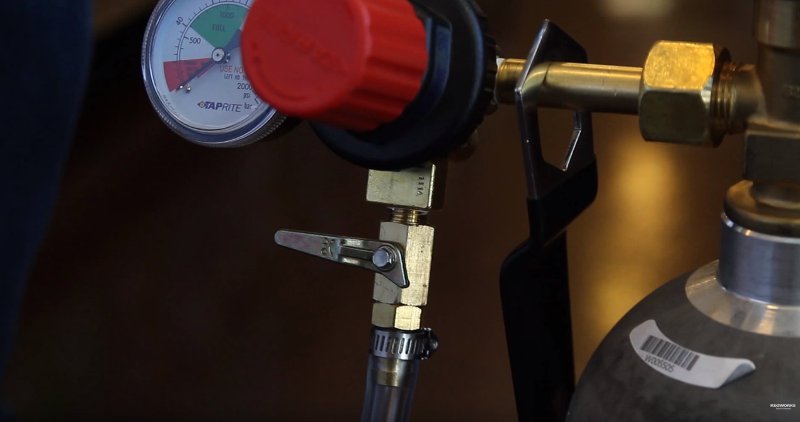
Attach one end of the air line to the nipple on the coupler and the other onto the regulator.
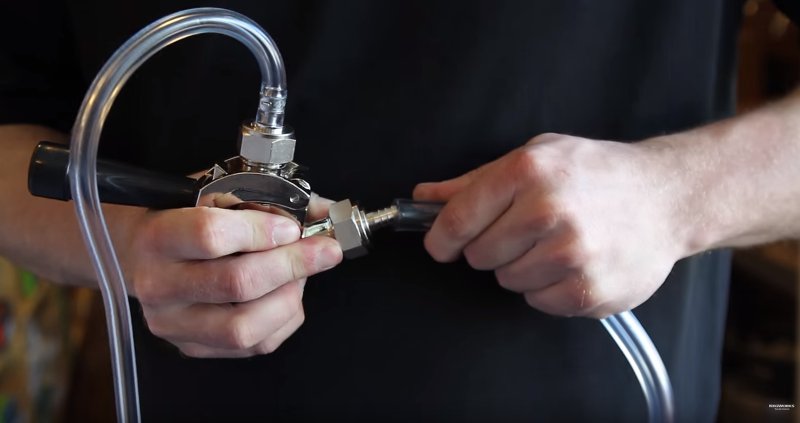
Tighten the hose clamps with a flathead screwdriver.
Then attach the regulator to your CO2 tank and tighten it with a hex wrench.
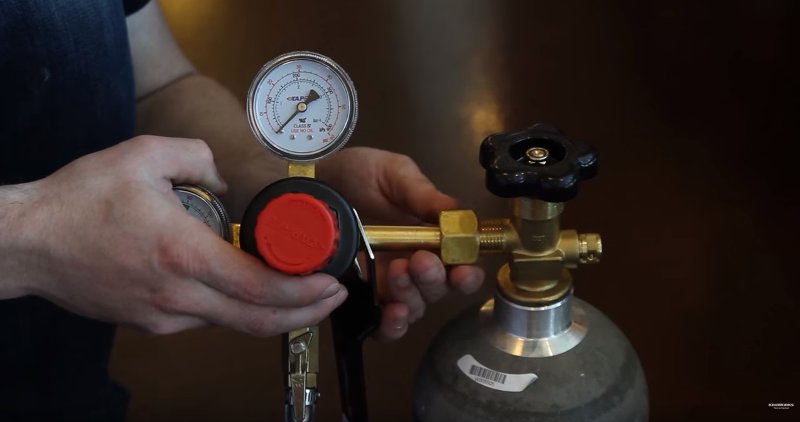
Please Note: our CO2 tanks ship empty due to federal regulations. You can get them filled at a local welding supply company.
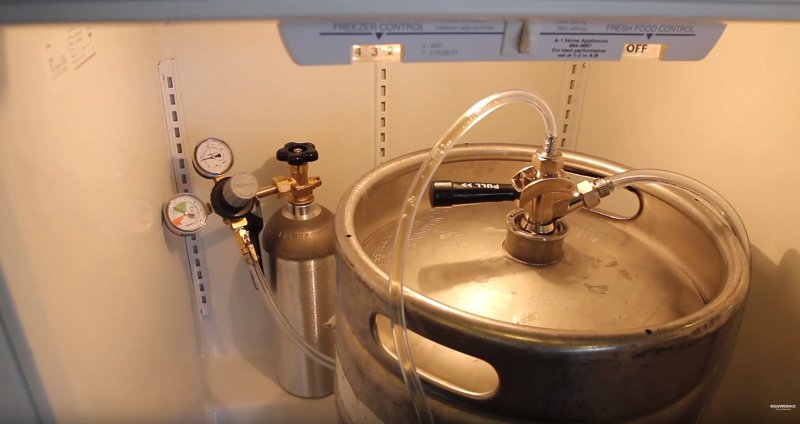
Step 4: Final connections and adjustments
Ensure the faucet and regulator switch are in the “off” position.
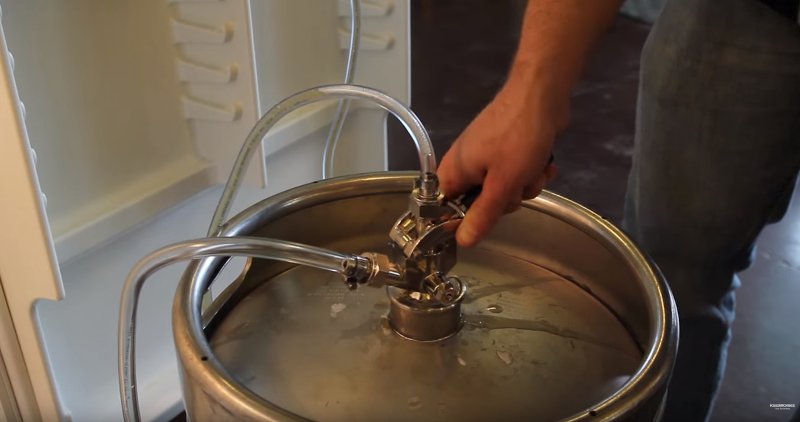
Open the CO2 tank and attach your keg coupler.
Adjust your regulator to a range of 10-12 psi.
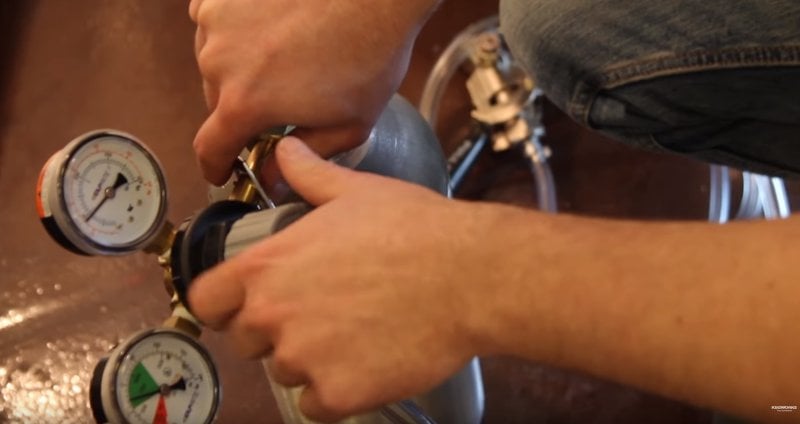
Then turn it on to allow the flow of CO2 to your keg.

Always be sure to stand your CO2 tank upright.
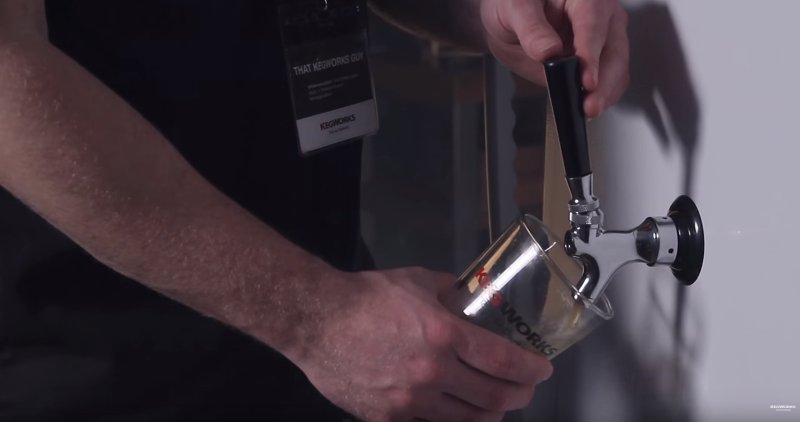
Step 5: Drink!
Enjoy the fruits of your labor by pouring yourself a tall and tasty pint!
Tips for new kegerator owners:
- Draft beer should be stored and dispensed at 36-40 degrees Fahrenheit. Keeping a thermometer inside the fridge is always a good idea.
- If your keg has been handled a great deal or has warmed up, it may take several hours to settle down and cool before pouring. So be sure to give your beer time to rest.
- Open the beer faucet quickly and fully. Opening the faucet halfway will cause foam. Once you've filled the glass, close the faucet quickly.
- When pouring, we suggest that you tilt the glass slightly to pour it gently down the side of the glass. For more tips on dispensing, check out our blog post on How to Pour a Perfect Pint.
- Keep your beer system clean! We recommend flushing your draft lines with a good rinse whenever you change your keg. This is the easiest way to ensure you pour nothing but crisp, tasty beer. Stock up on beer line cleaning supplies and kits here.
If you still have questions on how to build or maintain your kegerator, leave them in the comments, or please call us at 877.636.3673 anytime Monday-Friday between 9 a.m. - 5 p.m. EST.
Ready to make your refrigerator into a kegerator? Shop Kegerator Conversion Kits
Kegworks
Kegworks has been transforming hospitality spaces since 1998 with expertly crafted architectural metalwork and professional draft beer equipment, helping designers, architects, and bar professionals bring their visions to life.

Leave a Comment