
Let us take you through the process of how to build a keezer for pouring frosty cold pints of draft beer and more.

When it comes to dispensing draft beer, a keezer is an excellent alternative to a kegerator because it gives you the ability to customize the look and capacity to meet your needs. For those not familiar with the term, a keezer is a chest freezer converted to store and dispense kegs of beer, cocktails or wine. The conversion process typically requires removing the freezer’s lid to install a wooden collar where the draft components for dispensing your beverages are installed.
Keezer vs. kegerator
A keezer is very similar to a kegerator as both are used for refrigerating and pouring beverages on tap. The most significant difference is that a keezer has the room to hold more kegs than your standard kegerator, which makes them popular with homebrewers and craft beer enthusiasts. You can have as many as four or five different beer styles on tap, depending on the size of the kegs and freezer that you use. Keezers also tend to run quieter and more efficiently than kegerators.
A potential drawback to using a keezer instead of a kegerator is the fact that you’ll have to lift a keg of beer high enough to place it inside the chest freezer. A standard half keg may be too heavy for you to pick up on your own, so this might not be a good option if you plan on pouring beers that are only available in kegs that size. Sixtels (sixth barrel keg) and corny kegs are lighter and easier to lift.
Space may also be a concern when deciding between a keezer and kegerator. A chest freezer is much larger than a kegerator, so make sure you have enough room before choosing between the two.
Planning your keezer build
When planning out your keezer, the first thing to do is decide how many taps you want to have and what size kegs you’ll be buying. Knowing how many barrels you need space for will give you a better idea of what size chest freezer to purchase.
For our project, we decided that we wanted to create the ultimate keezer that will have a beer, wine and a cocktail on tap. This means, for the purposes of these instructions, we’ll need a three-tap keezer that has room for a sixtel keg of beer and two 2.5 gallon corny kegs (one filled with wine and filled with a cocktail). One other thing to consider is the space needed for your gas tank. We’ll need both a CO2 tank to dispense the beer and a nitrogen tank to pour our wine and cocktail, so we’ll need room for two gas tanks.
You can draw up a diagram to make sure you’re choosing the right-sized chest freezer. Use our guide to keg sizes to get the diameter of the kegs to help with your diagram. Based on our diagram below, a 7.1 cubic foot freezer has just enough room for the keezer we’ve planned.
Building and installing the keezer collar
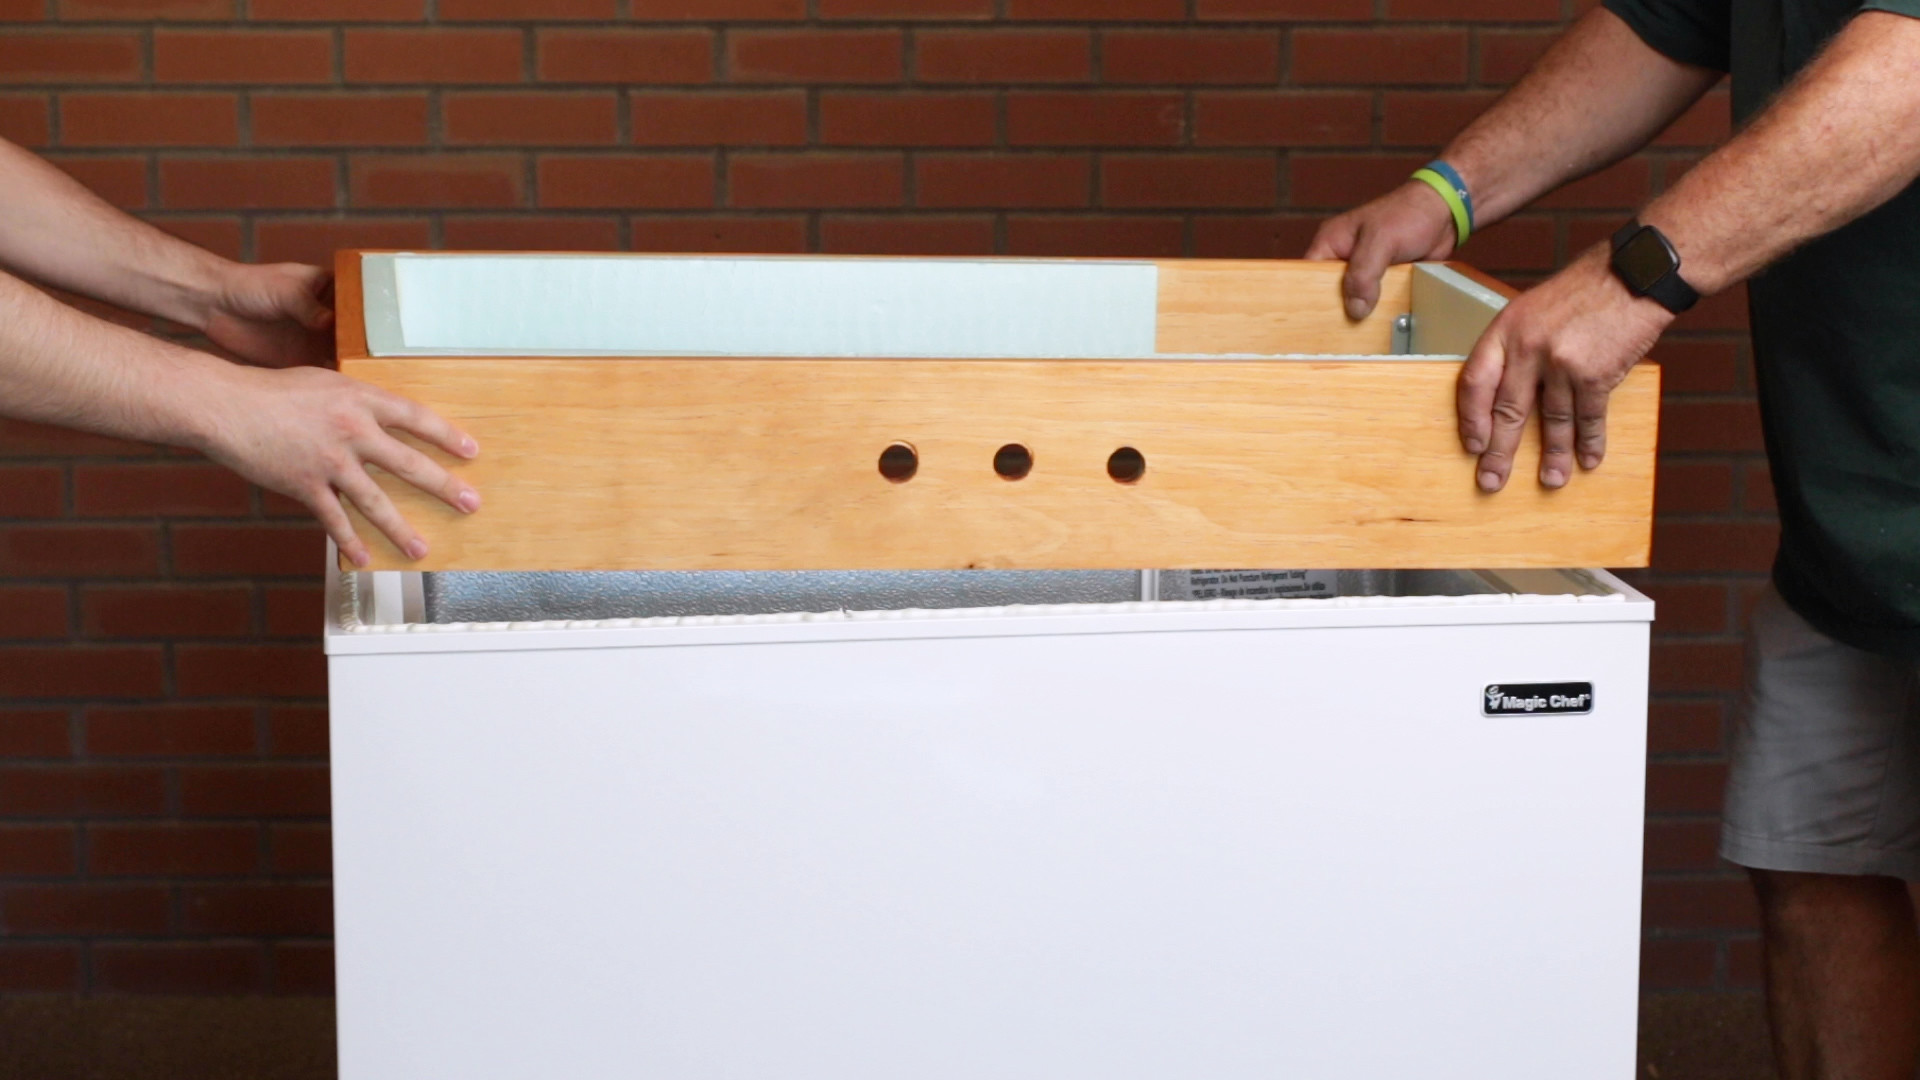
Once you’ve purchased the chest freezer and brought it home, the next step is to remove the lid. Loosen all of the screws on the hinges and have a partner help you lift the lid off of the freezer. Measure the top lip of the freezer to determine how big you’ll need your collar to be.
Supplies for building keezer collar:
- Wood (we used two 6’ (L) x 6” (W) x 1” (D) pine boards for our collar)
- Foam board insulation
- Corner brackets
- Screws
- Wood glue
- Liquid Nails
Start by measuring and cutting your wood. We used a miter cut to achieve clean-looking corners.
Measure and mark where you want to place your taps on the front of the collar. We recommend placing yours centrally with 3” of spacing in between. Drill the holes using a 1” hole saw.
Glue the boards together and allow them to dry. We also added corner brackets to our collar for extra support, but you can construct it to your liking.
Once the glue dries, and your collar is assembled, sand and finish the wood with a waterproof finish on all sides. Apply two coats of finish while lightly sanding it in between to achieve a smooth finish.
The next step is to measure and cut the foam insulation. Install it on the inside of the collar using Liquid Nails. Since we’ll be using nitrogen for both the wine and cocktail on tap, we left a small section on the collar without insulation to mount a gas distributor to send gas to each keg.
Finally, you will attach the collar to the freezer by applying a bead of Liquid Nails around the lip of the freezer. With the help of a partner, lower the collar onto the freezer. Replace the freezer lid and place some weight on top to adhere securely. Allow two days for the adhesive to dry.
Once the adhesive has dried, align the lid with the collar and attach the hinges. Drill pilot holes in the collar and install screws to secure the lid in place on top of the collar.
Adding the temperature controller

A keezer requires a temperature controller to help keep it at the proper temperature without freezing your beverages. You can mount the controller unit outside of the keezer and place the temperature probe inside it.
For our keezer project, we mounted the temperature controller on the back of the freezer chest using one of the screws from where the hinges were attached initially.
To get a more accurate temperature reading inside of the keezer, we taped the probe to a bottle of water. You can also tape it to a keg or just let it hang in the freezer and still get a good reading.
Plug the keezer into the cooling side of the outlet on the controller unit and then plug the unit into an outlet. Set your temperature controller to the appropriate temperature for the drinks you’ll be serving.
If you need help with the proper temperature setting, check out our blog How Temperature Affects Draft Beer Dispensing or our guide to Speciality Beverages on Tap for wine, cocktails and additional drinks.
Assembling the draft components
Now that you’ve assembled and installed your keezer collar and got the temperature controller set up, the next step is to install the draft components for pouring your beverages.
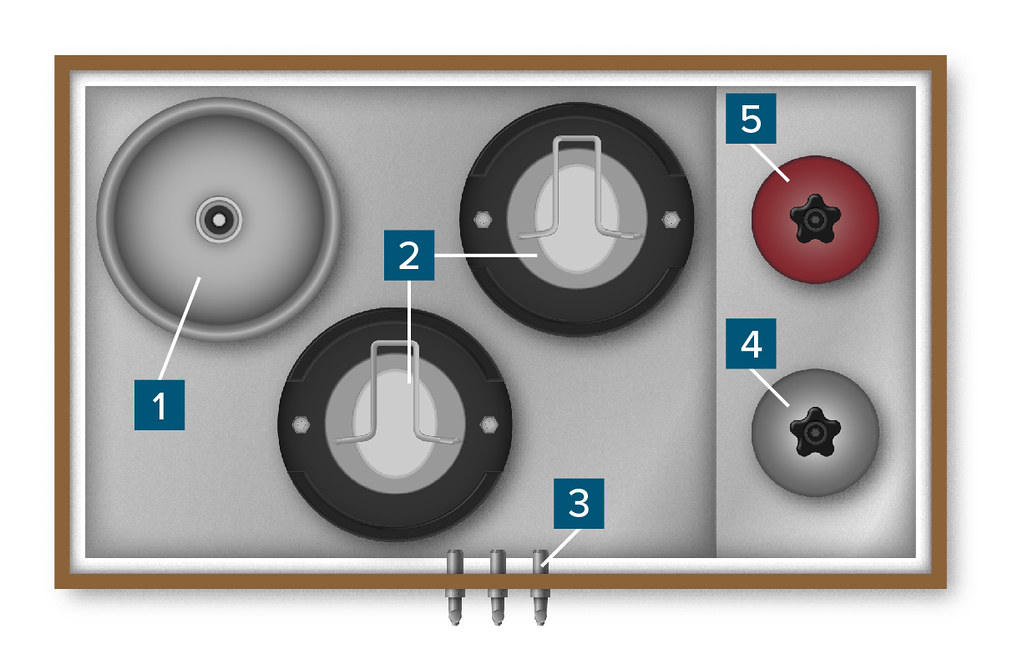
The following is a list of parts and components we’ll need for our keezer project. It will give you a good idea of what to use for your build, but it will vary depending on the number and type of beverages you plan on serving. (Luckily, KegWorks has plenty of draft beer supplies to help you get what you need)
Draft components for keezer:
- 5 lb aluminum CO2 air tank
- Nitrogen gas tank
- Double gauge CO2 regulator
- Double gauge nitrogen regulator
- 4 - 5’ Air line jumpers with screw clamps
- 2-way gas distribution bar
- US Sankey D-system coupler
- 2 - Gas side ball-lock quick disconnects
- 2 - Liquid size ball-lock quick disconnects
- 5’ vinyl hose beer line jumper with stainless steel connectors
- 2 - 5’ barrier line jumpers with stainless steel connectors
- 3 - 4” stainless steel shanks
- 3 - Perlick stainless steel draft faucets
- 2 - Tap handles of your choice
- 2 - 2.5 gallon corny kegs
Constructing the gas side components
Start by connecting the distribution bar to the nitrogen regulator and tank to deliver gas to each corny keg. Connect three of the air line jumpers to the fittings on the distribution bar. Take the opposite end of the two air lines coming from the outputs of the distribution bar and connect a gas ball lock to each one.
Connect the nitrogen regulator to the air line going into the input of the distribution bar, and then attach the nitrogen regulator to the nitrogen tank. Now mount the distribution bar to the inside of the collar where the gap was left in the insulation.
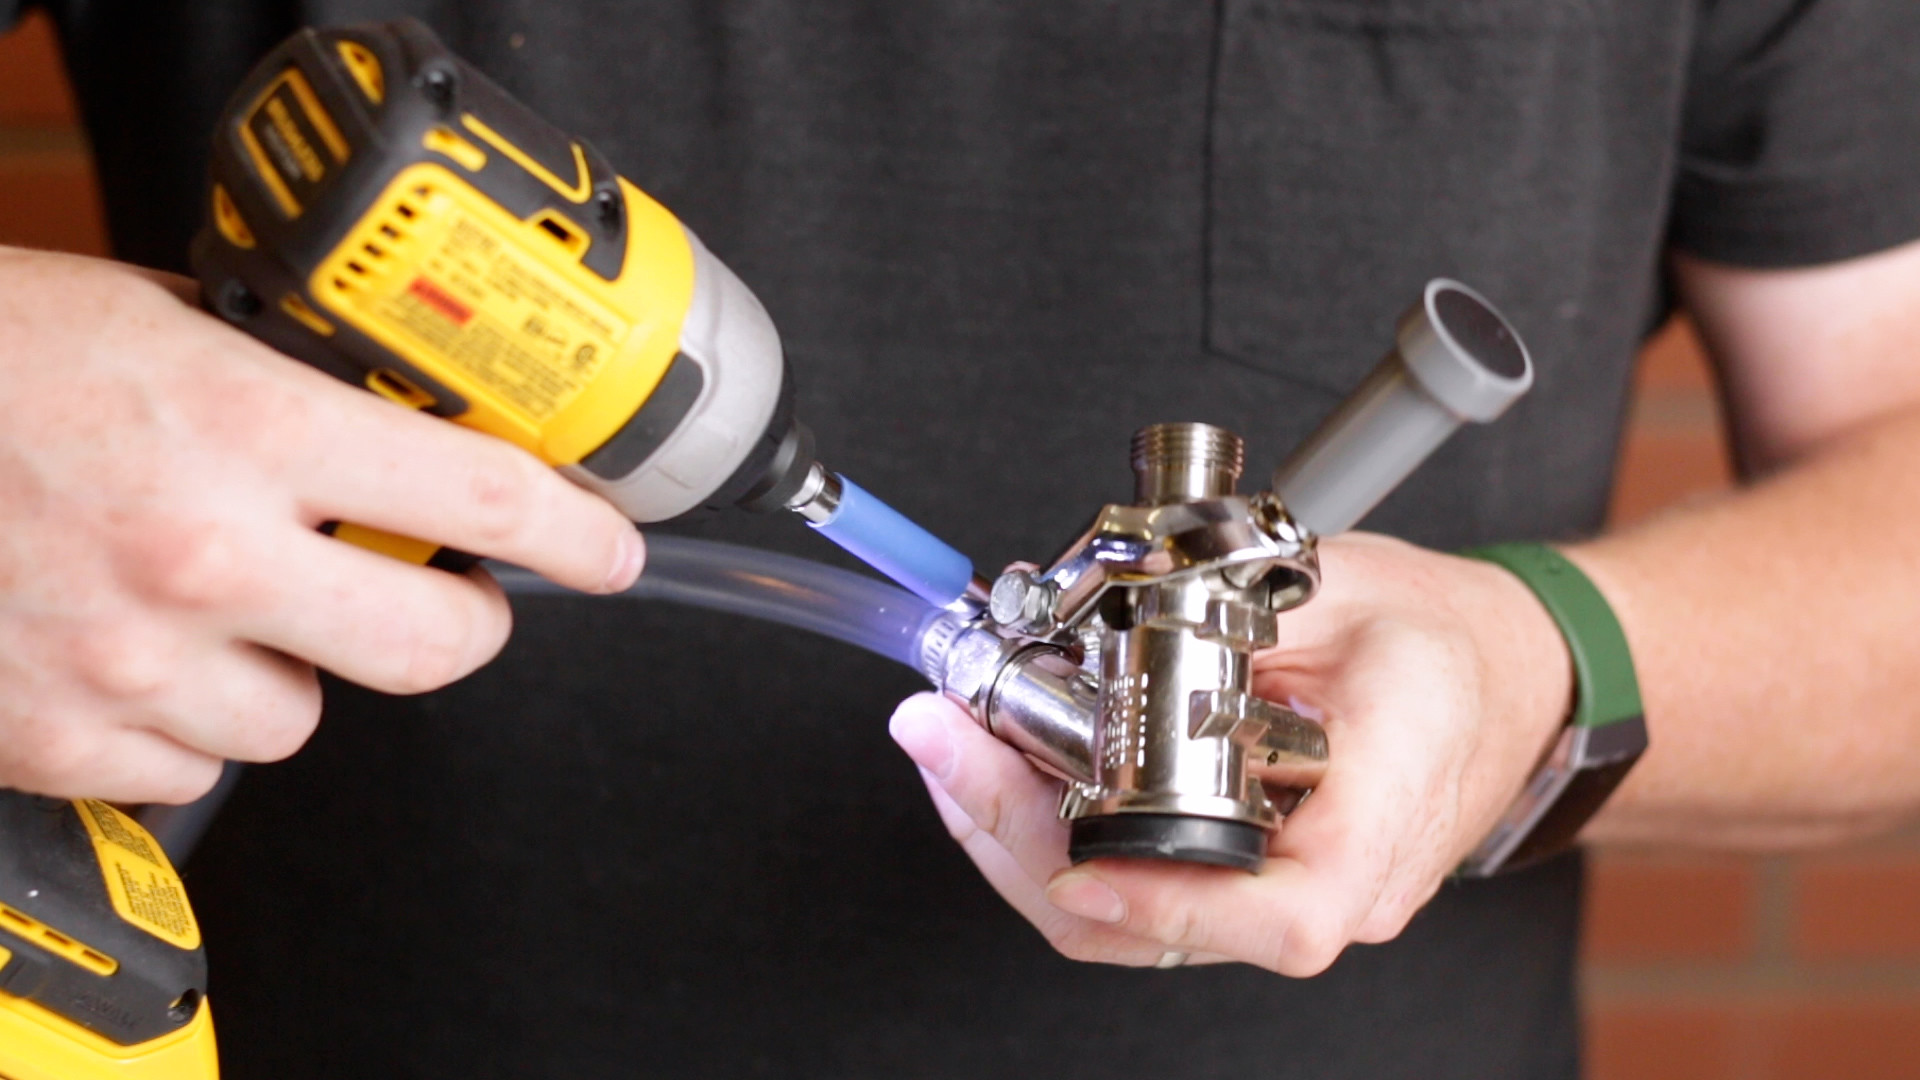
Use the remaining air line jumper to connect the Sankey keg coupler to the CO2 regulator and attach the regulator to the CO2 tank.
Assembling the beverage side components
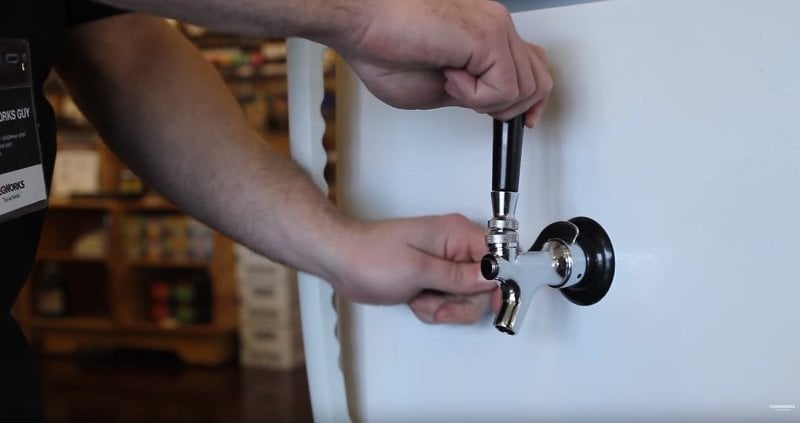
Start assembling the beverage components by inserting the faucet shanks into the collar and securing them by tightening the coupling nut on the back of the shank.
Take your vinyl beer line jumper and attach one end to the keg coupler and the other end to the first shank. Make sure to insert a beer line washer when connecting the jumper line to the shank. Attach the liquid side ball lock connects to the open end of each of the barrier line jumpers. Connect the hex nuts on the opposite end of the jumper lines to the remaining two shanks. Make sure to insert a beer line washer when connecting the jumper line to the shank.
Attach the three draft faucets to each of the shanks using a spanner wrench and screw the tap handles onto the draft faucets.
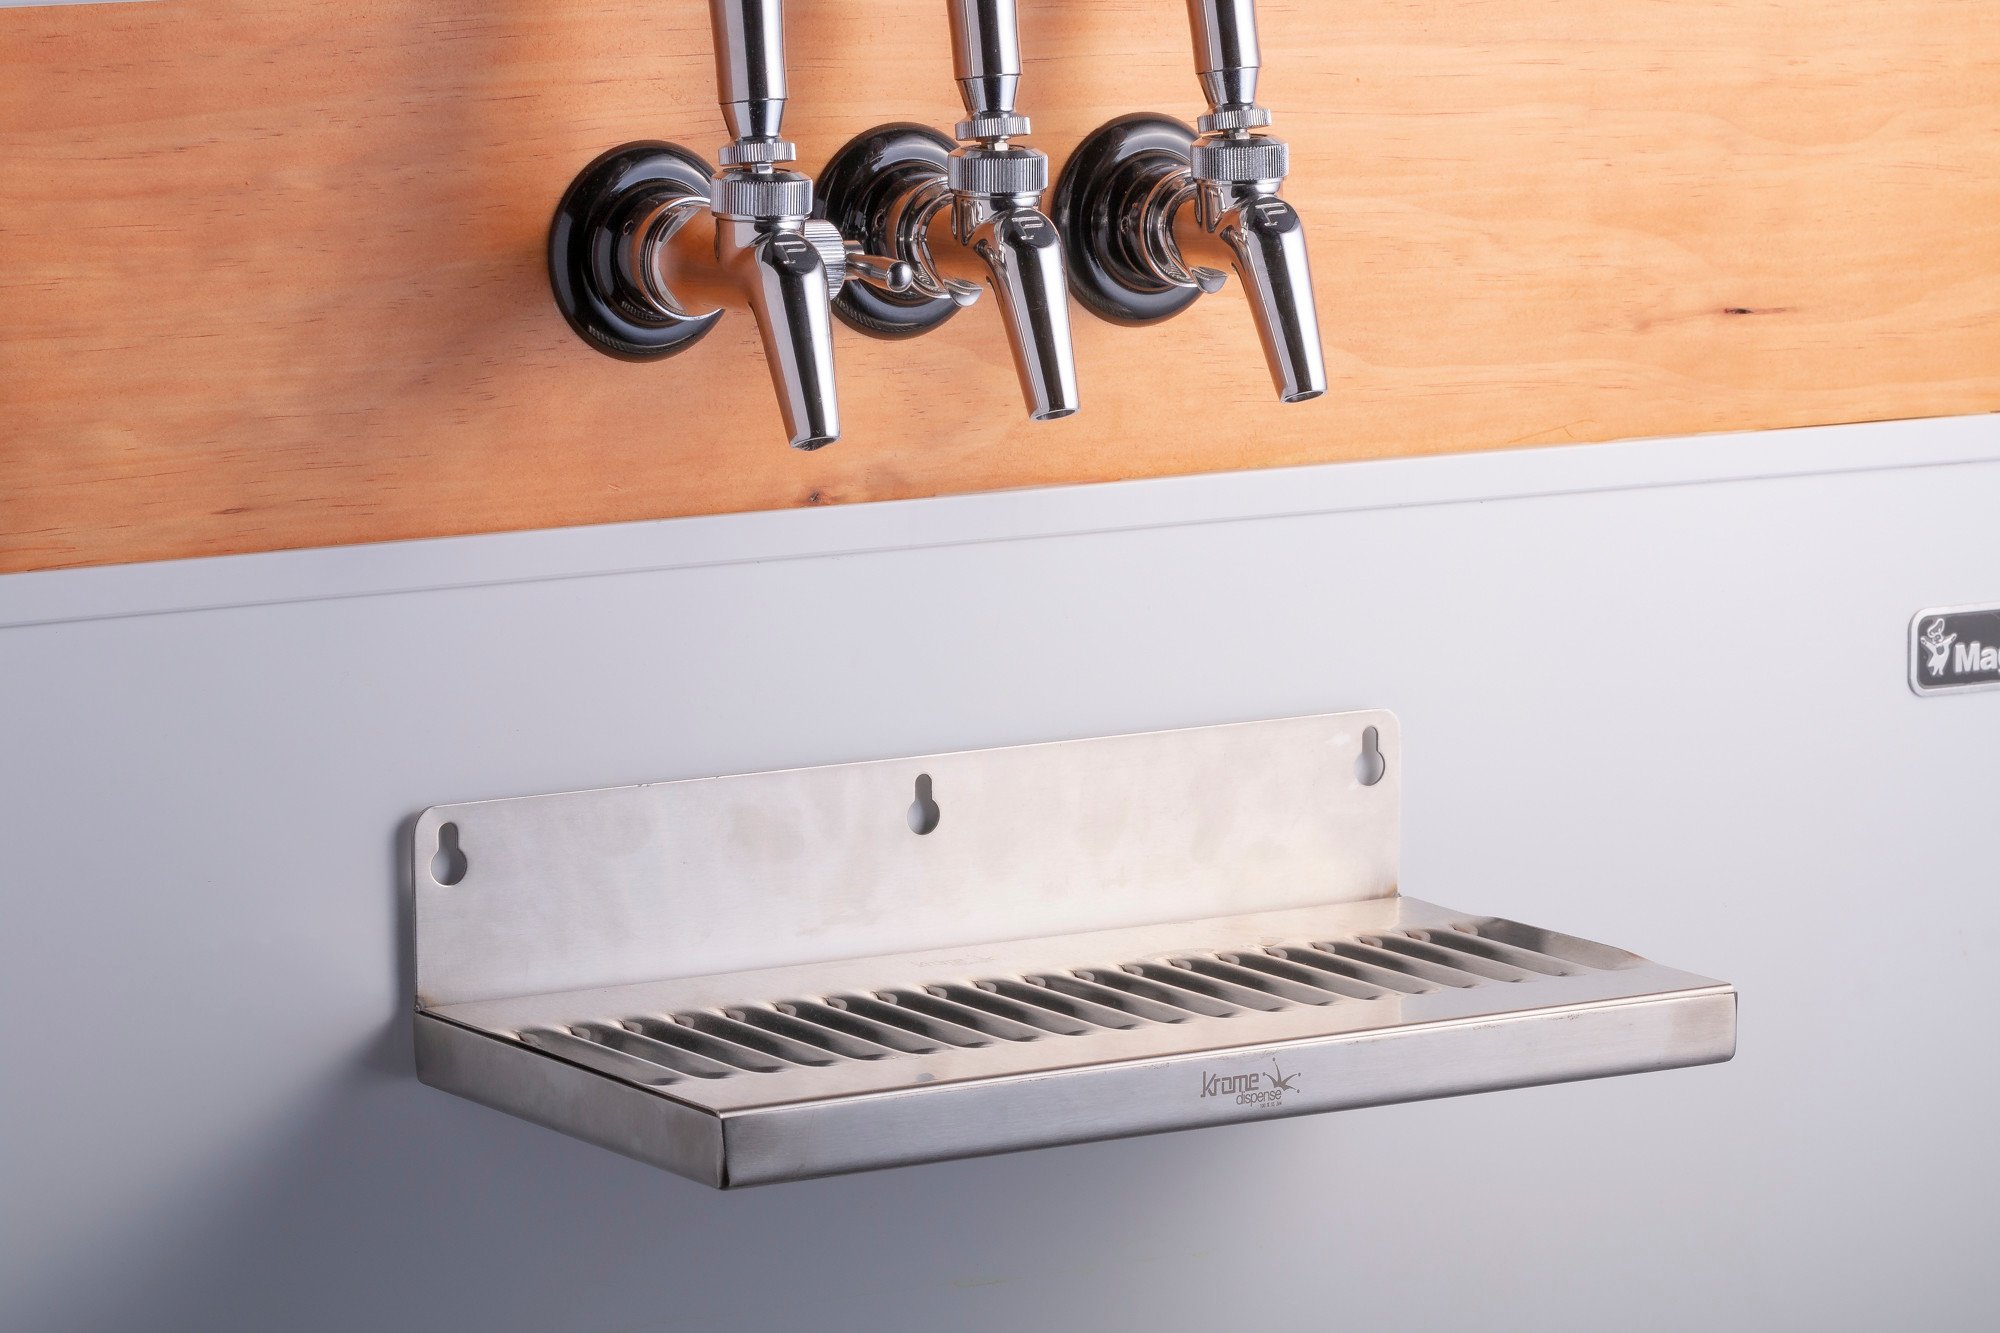
As a finishing touch, we used magnets to attach a wall mount drip tray to the front of the keezer. Using magnets allows you to remove the drip tray for easy cleaning.
Final steps
Before tapping your kegs, we recommend that you clean your draft lines, keg coupler and faucets to ensure a sanitary system. You’ll also want to make sure your kegs are properly chilled before serving.
To connect the kegs to your keezer, attach the Sankey coupler to your beer keg, and the liquid ball lock connects to the two corny kegs. Then you can enjoy your favorite beverages on tap with your very own keezer!
Did you build a keezer? Tell us about it in the comments below or tag us in an image on Instagram or Facebook so we can see the finished product.
Kegworks
Kegworks has been transforming hospitality spaces since 1998 with expertly crafted architectural metalwork and professional draft beer equipment, helping designers, architects, and bar professionals bring their visions to life.

Leave a Comment